Well. What a journey. I can’t believe I’m finally putting together this completed van conversion blog. For a more detailed visual journey of what we got up to during this camper conversion, keep your eyes peeled for the YouTube video coming soon! I’ve tried to cover off as much info as possible without making this blog insanely long (even though that is my specialty), but naturally there are so many little steps and elements that have gone into this camper build. So if you have any questions on something that hasn’t been covered here, you can find me on Instagram here or email me here. I also have a story highlight on my Instagram @lola.photography where I share a lot of the journey and run through some things in more detail. Links to everything is listed at the end of this blog!
We started this journey over 1 year ago when we began our hunt for a 4 motion Volkswagen Transporter T5 with diff lock. I can now tell you with confidence that this was no easy feat. As it turns out, these vehicles do not pop up second hand in New Zealand very often. We spent a good 6-8 months looking every day until our T5 got listed in little ol Nelson.
We were originally on the hunt for a long wheel base (LWB), but when this short wheel base (SWB) popped up, we knew we had to take our chance and grab it. Not only did she have 4WD with diff lock, but she also had a factory lift. Bloody glorious! Here she is in all of her original glory.


While we compromised on some space, we were rewarded with a very manoeuvrable van that still fits in your average car park. The difference between a SWB and LWB is 40cm. While that doesn’t sound like a lot, it definitely see’s a sacrifice in a bit of storage room. But in enlisting the help of the best vehicle outfitters in the country - Judge & Company - we were able to make the best use of the space we had. More on that later.
The whole project took us about 9 months, however it’s important to note I don’t think a build like this would typically this long. There were a few things that impacted our timeline such as overseas trips, selling our house & moving towns, seat install/certification logistics and having a toddler. Seriously try do anything with power tools with a toddler around. The toddler always wants a turn *lordgivemestrength*. So often it was usually just one of us chipping away at things while the other had parenting duties under control. Another huge factor was we didn’t have a designated space to work on the van. We were just doing it in our driveway outside a little townhouse and had to pack everything away every time we were finished using it. It meant that we were impacted by the weather too. Having a garage were you could leave the van and all your tools to just pick up where you left off would be ideal. Being able to fit in an additional hour here and there after bedtime would have accelerated our progress massively. So I’d say more realistically a build like this should take more like 3-4months. Even quicker with the help of a vehicle outfitter. But we chose to DIY as much as we could on the count of ✨cost of living crisis✨ and went for a custom fit out for the cabinetry.
A really key element of our van for us was seating. We needed to find a way that we could fit 2 adults and one toddler in, all with seatbelts. So we were faced with our first challenge (and turns out, most time consuming and most expensive challenge.) Our first thoughts were a bench seat in the front. This wasn’t the safest option as putting a 3 year old in the front seat is not ideal, and it didn’t support the opportunity for our family to grow one day. Putting in additional seats in the back meant a huge sacrifice on space and wouldn’t allow us space for a decent sized bed or cabinetry.
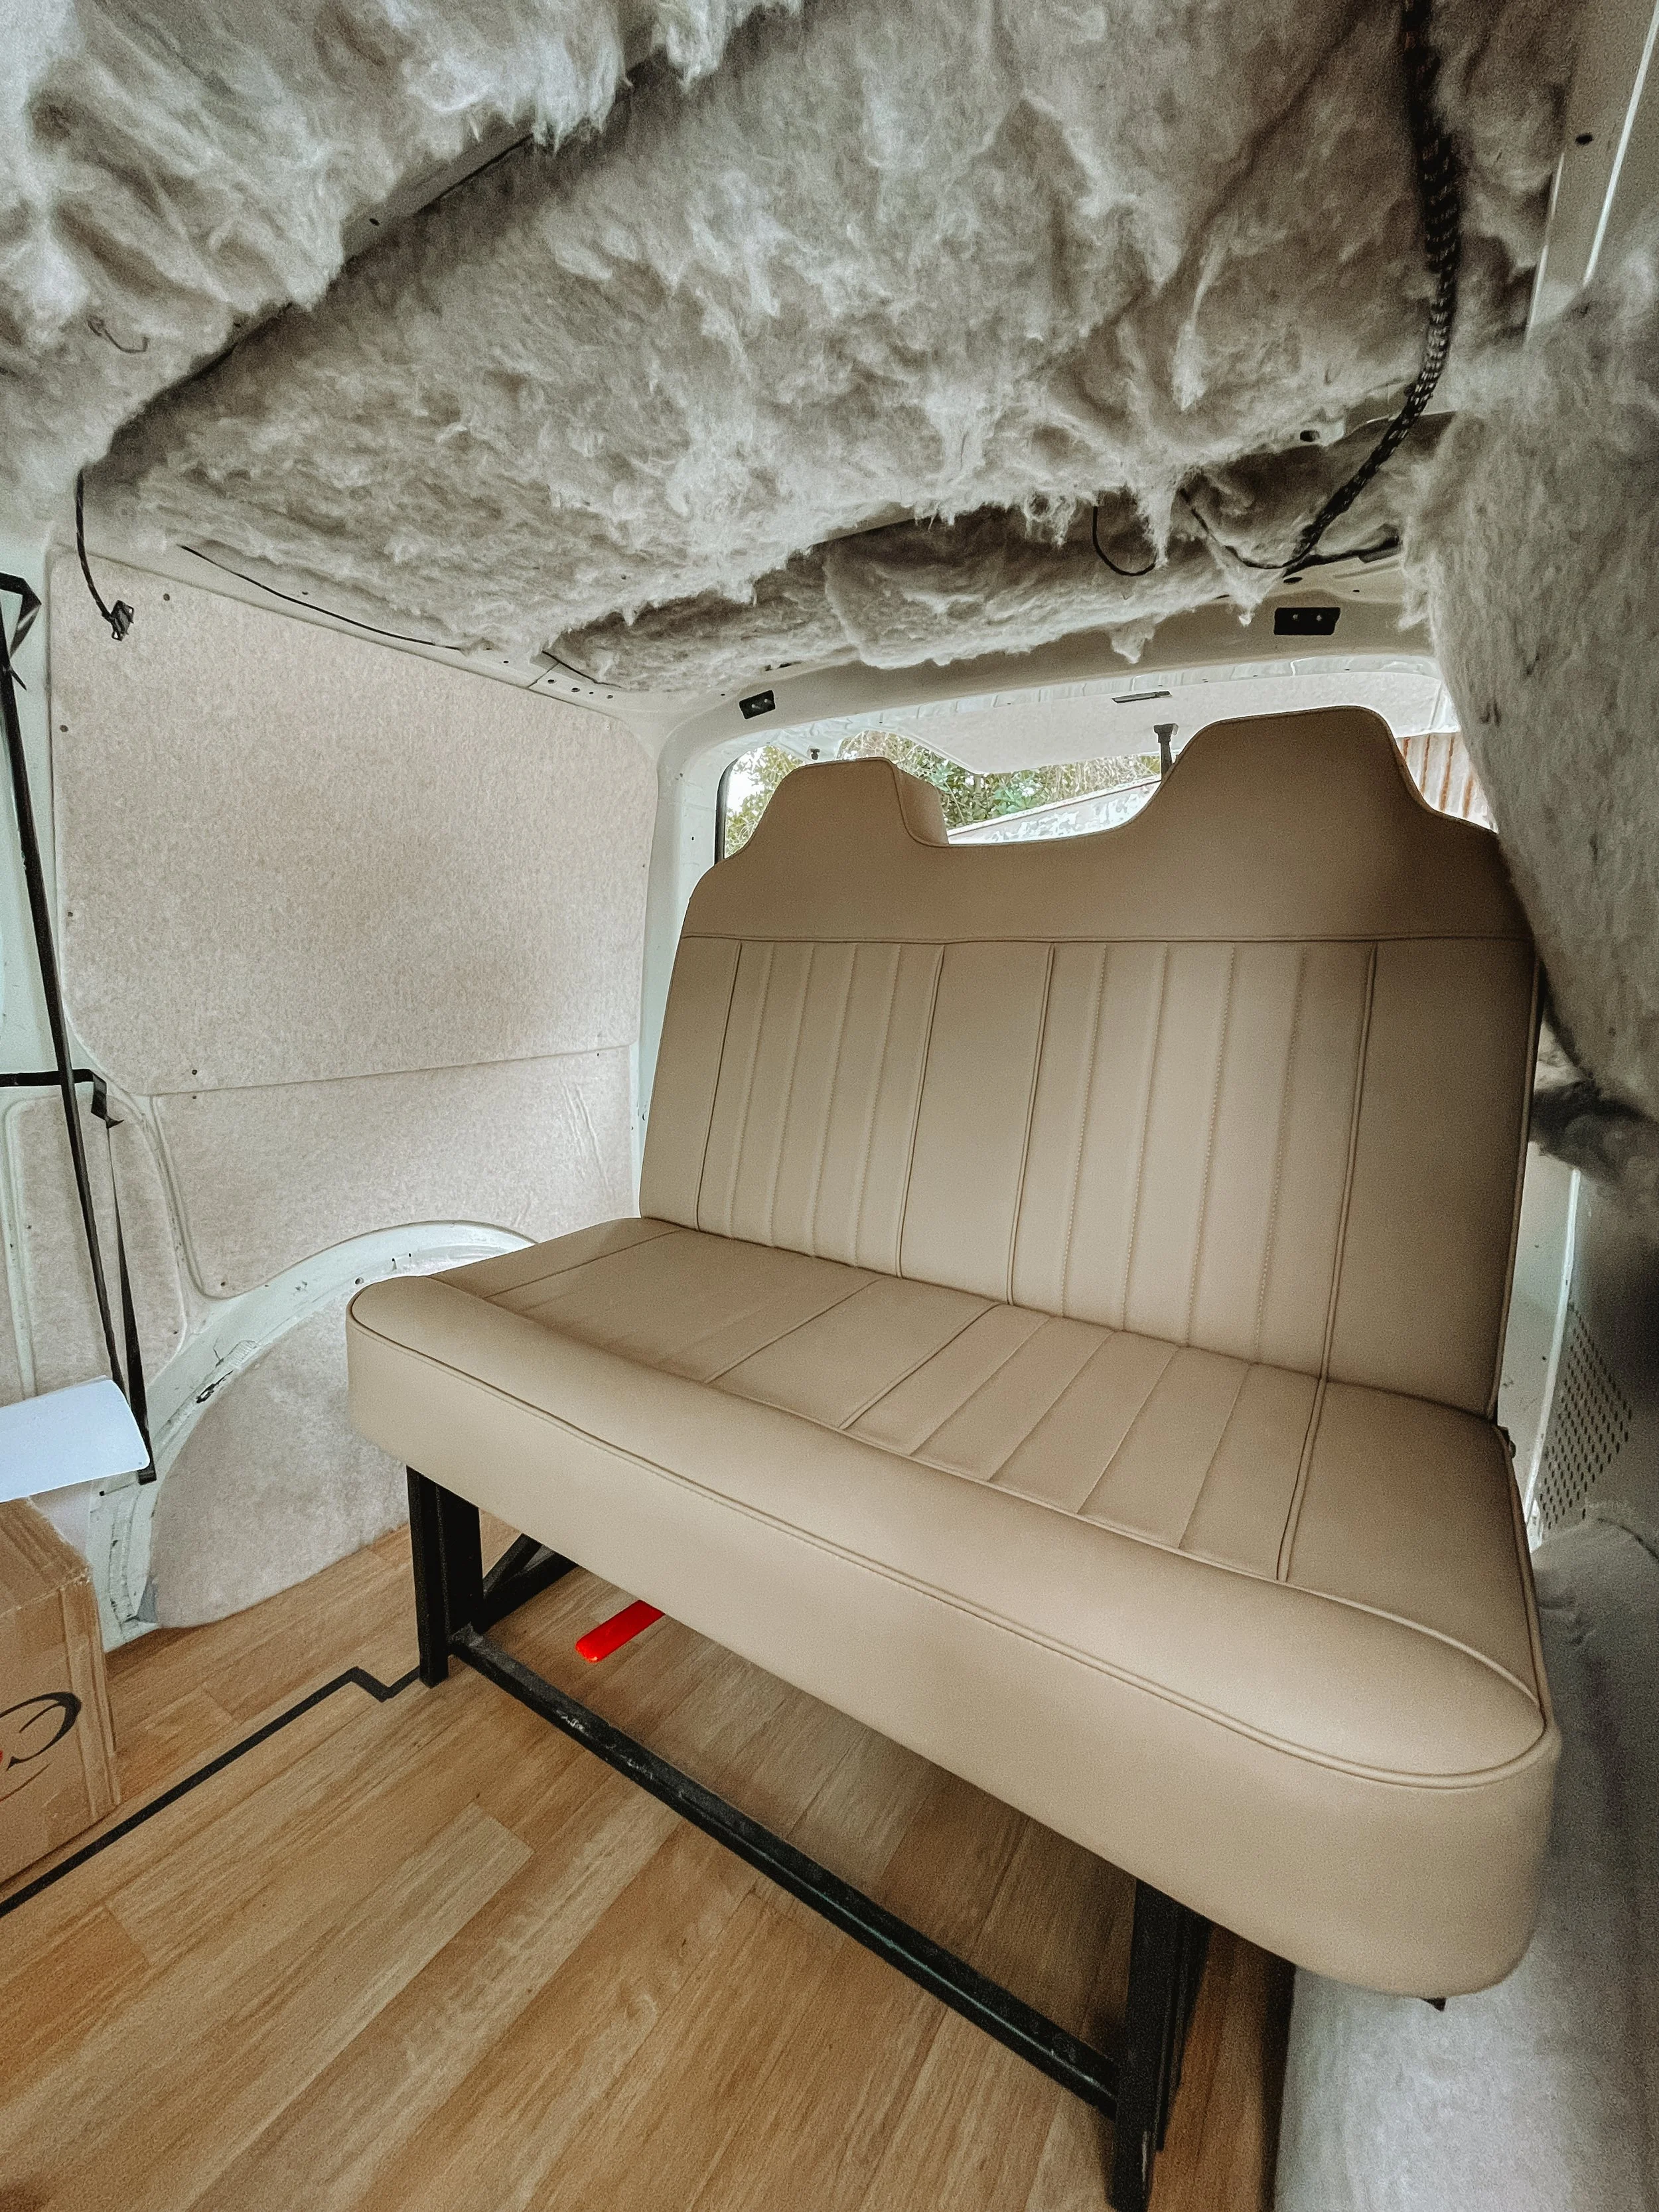
Upon a bit of research into how a T5 camper is traditionally decked out in the UK, we discovered the “Rusty Lee Rock and Roll Bed”. A custom built, fully crash tested bench seat with seatbelts that doubles as a bed. Two birds one stone, ideal! We of course already had our Feldon Shelter Hawkes nest, but it was of utmost importance to be forward thinking in the event our family could grow. Meaning we would need sleeping space for 4 people. Luckily for us, a supplier in Christchurch had one Rock and Roll seat left in exactly the size we were looking for - 3/4 width. After a spot of due diligence to ensure we could easily get the seat certified for New Zealand roads, we made our first big purchase for our van conversion. Spoiler: getting the seat certified was not as easy or as affordable as we were told. But in the interest of chronological story telling, I shall digress and revisit this conundrum later in the blog. Said seat in it’s factory form:


Disclaimer - any links to products/materials used are not sponsored unless specified! The links are for anyone following this blog as a guide for their very own camper build. A full summary of all links is included at the end of this blog.
First order of business was to rip up the old flooring, replace it with some sound deadening, nice new fresh ply and get the side panels off to prep for insulation. As far as we know, this VW Transporter was originally purchased by a company that was collecting rock and soil samples - something to do with Geotechnical ground engineering. So as a result, it was absolutely caked with soil and dirt in every nook and cranny. As soon as we lifted the old flooring, we got a big wiff of Punga smell. So I imagine this van had spend a bit of time around the New Zealand bush!
We were lucky the van already had ply down as we could use this as our template.

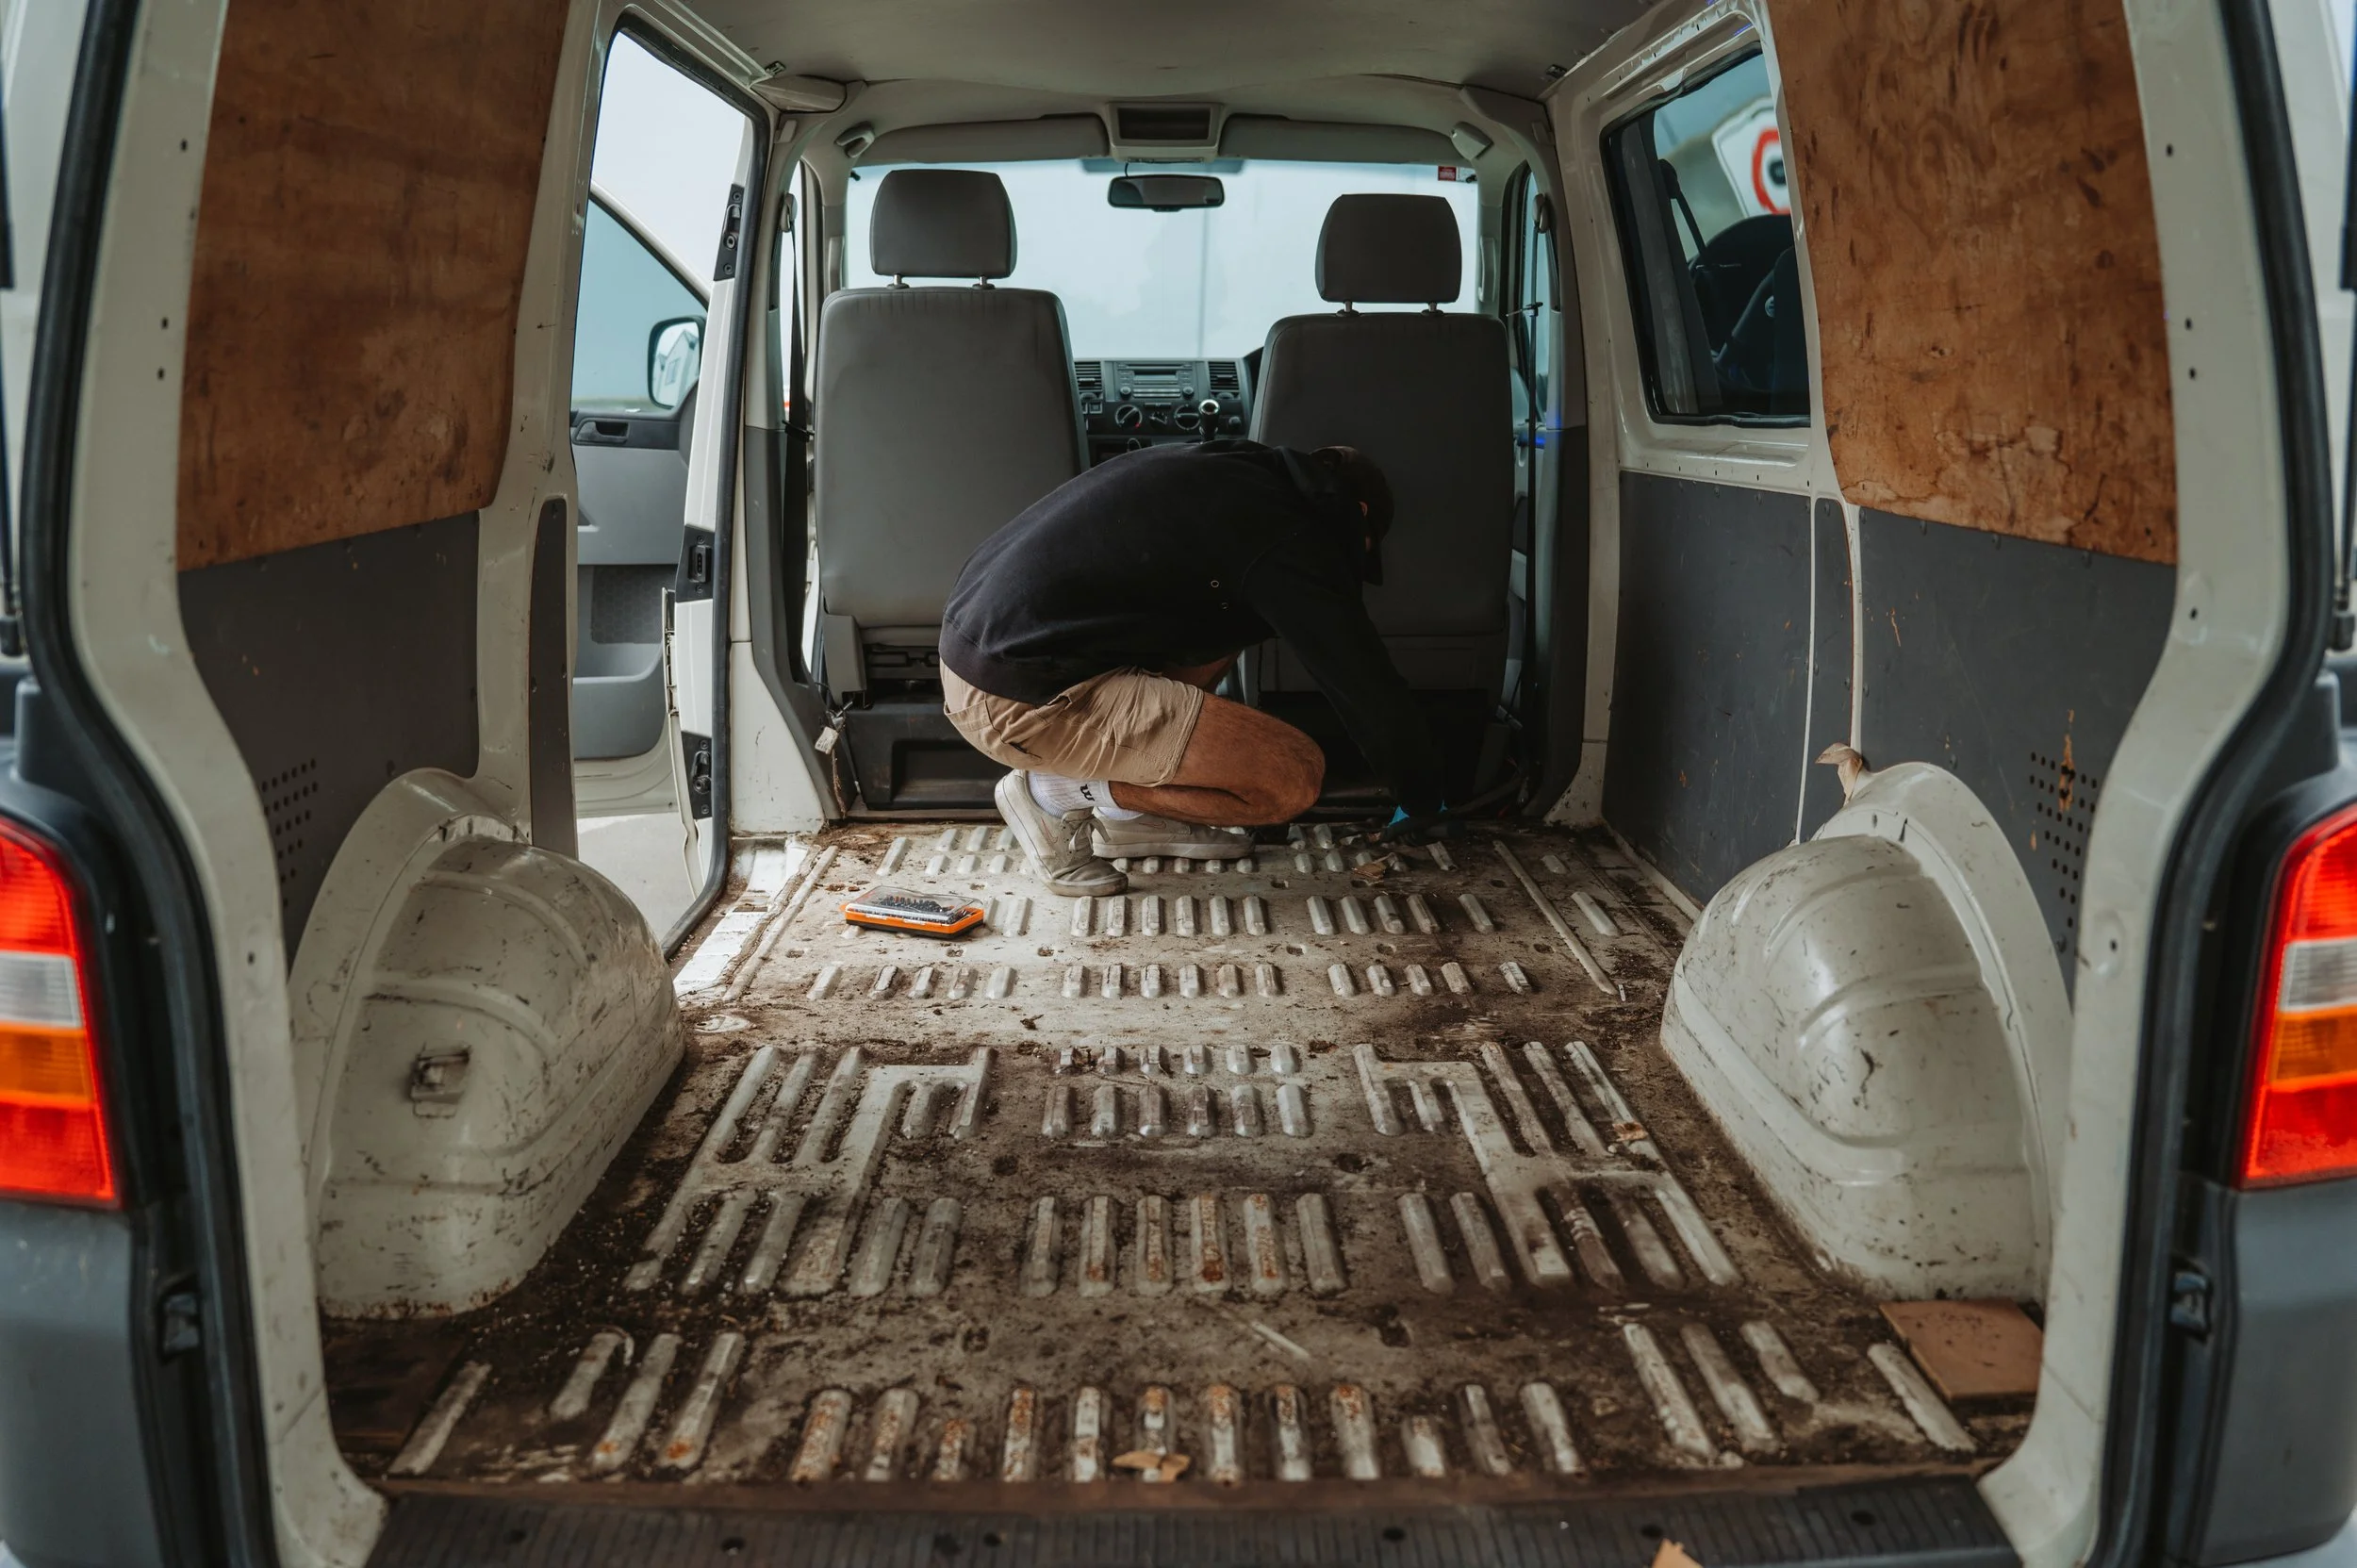


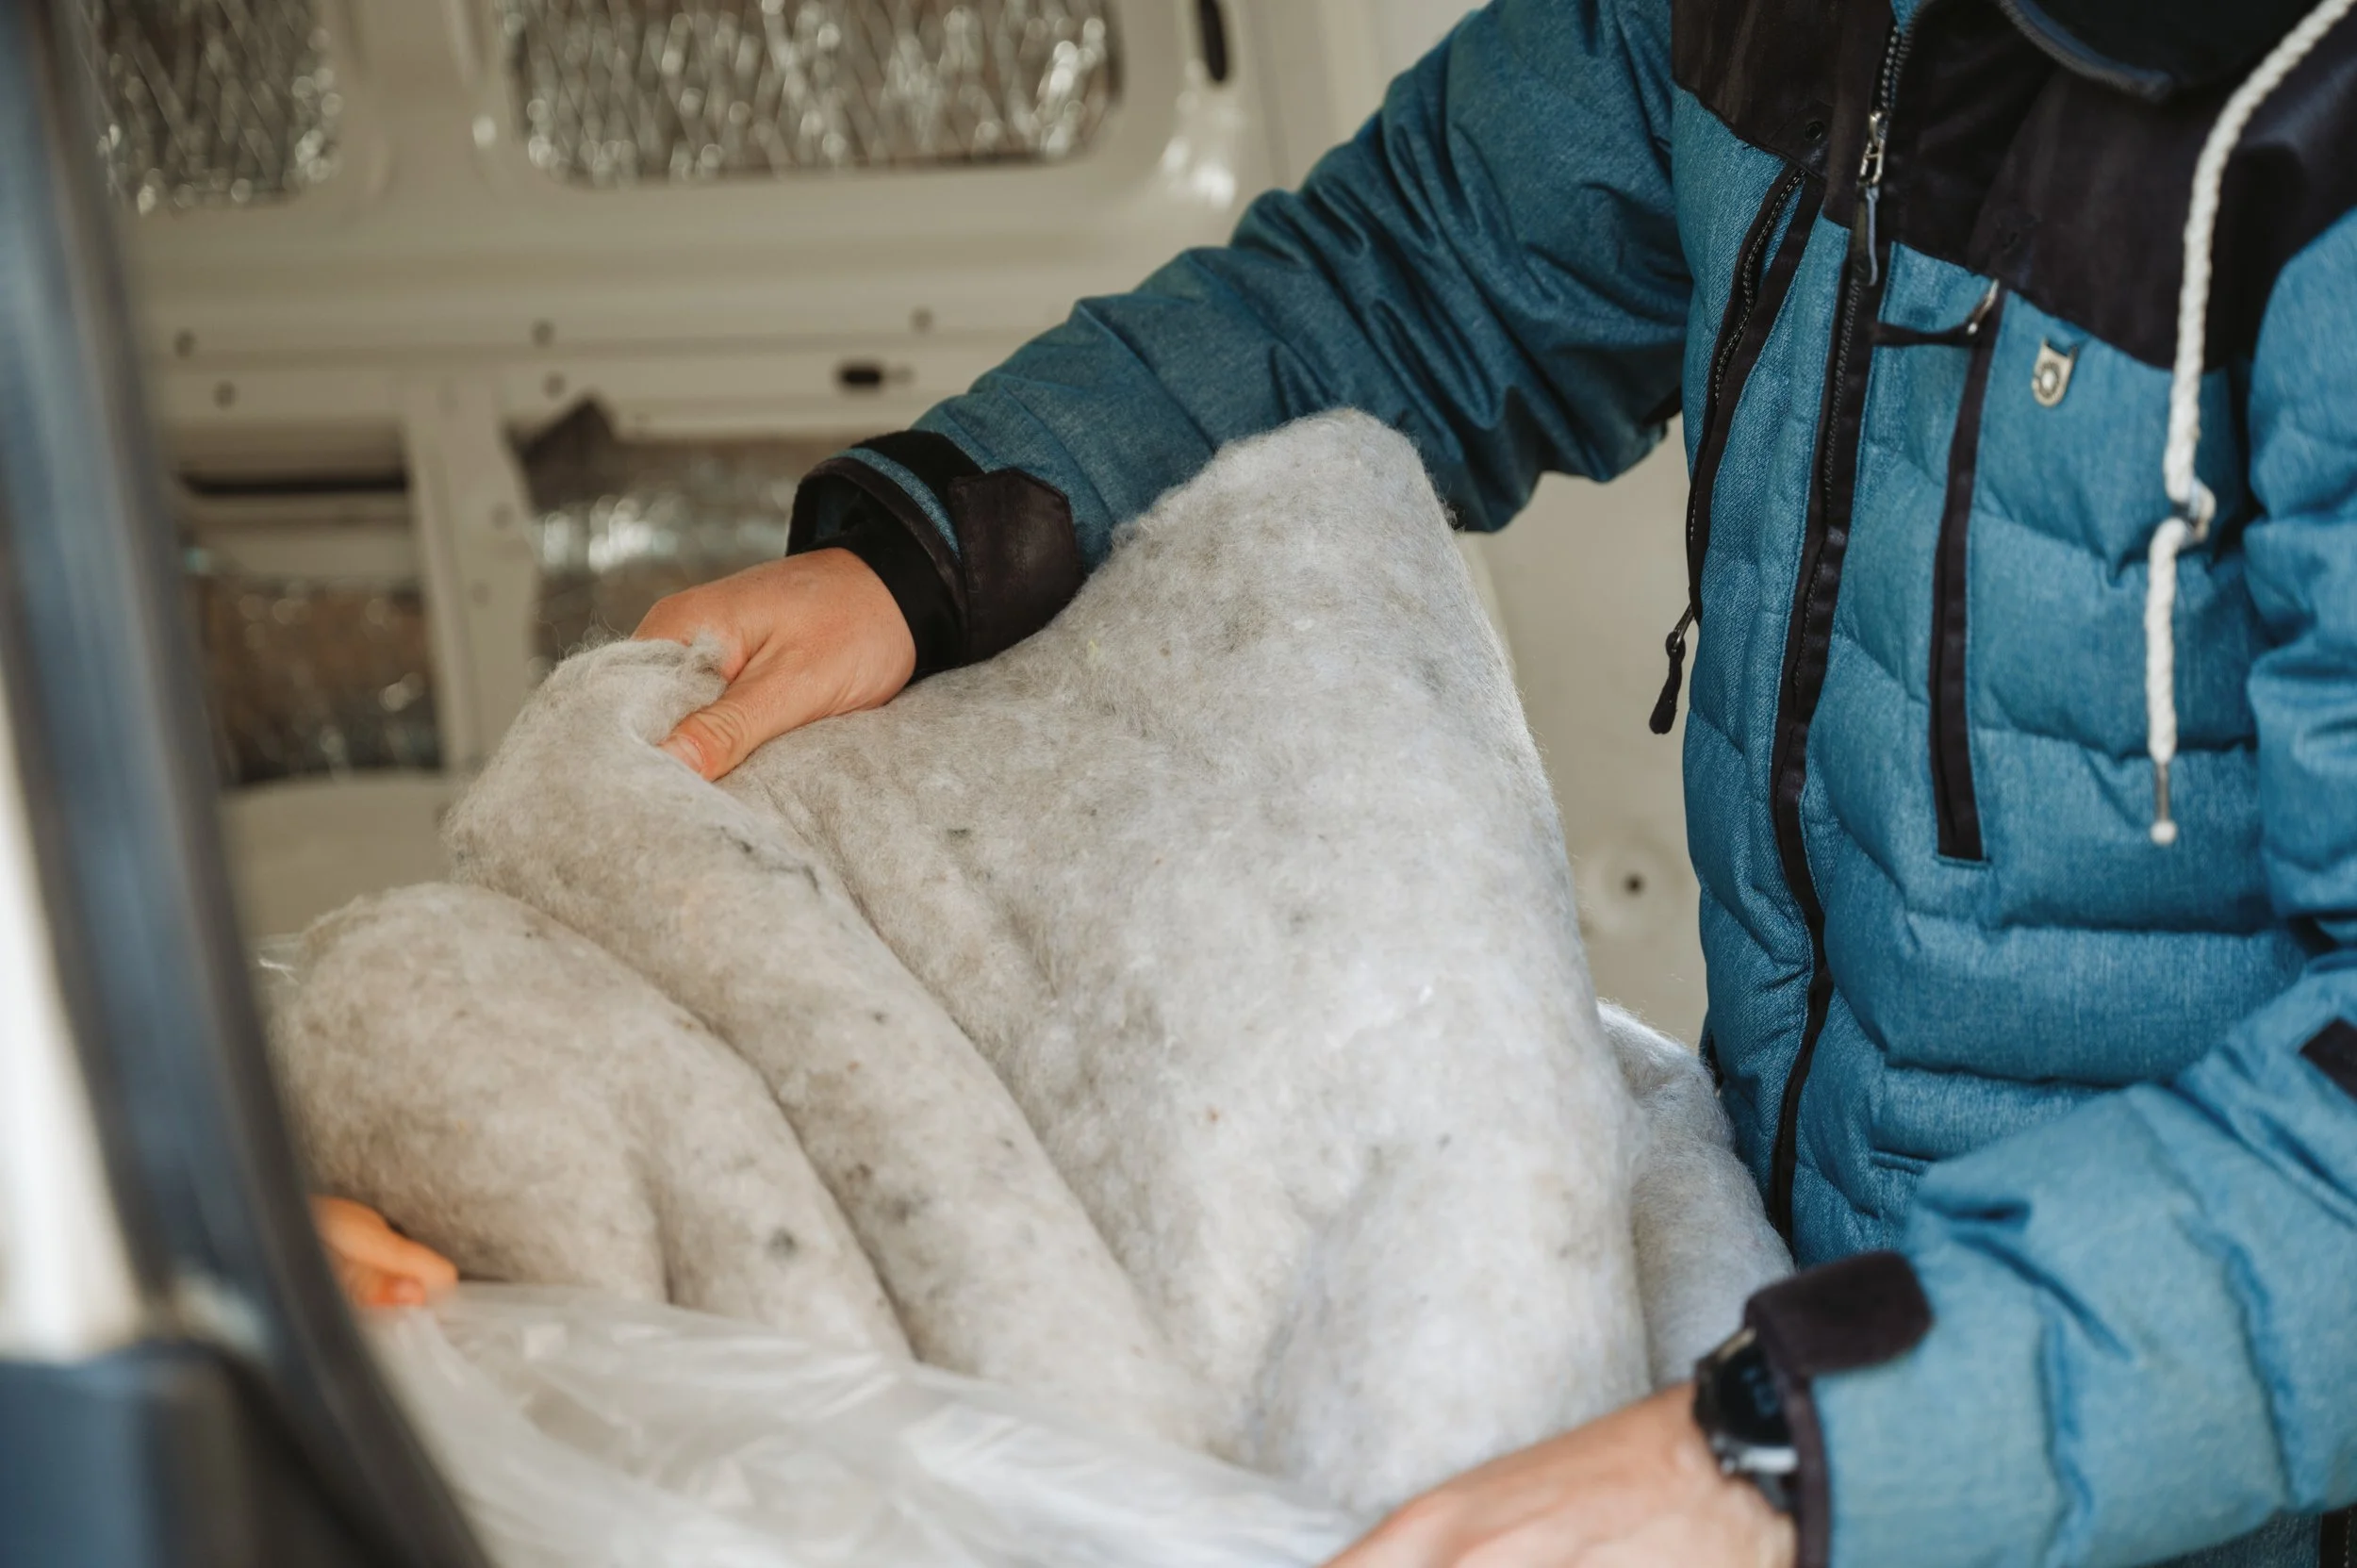
It was so satisfying finally seeing this thing gutted so we could start insulating. We used some sound deadening that doubled as insulation on parts of the wall, ceiling and all over the floor before we fixed the ply down. It was easy peel & stick we found on Aliexpress. We also picked up a huge roll of thick, cosy NZ wool insulation from https://www.woolinsulation.kiwi/ for inside the walls. Insulation is essential for not only warmth on those cooler nights, but actually helps keep the van cool on super hot days and nights too.


Just as we felt like we were making some good headway, bam, first spanner in the works. After some heavy rain, we discovered a leak coming down under the front passenger seat. This meant we couldn’t fix down the floor until we solved the leak mystery. We of course didn’t want to go to the lengths of fixing everything down and laying the lino flooring over the top only to have to rip it up later due to the ply swelling and rotting. We got some mates involved to speed up the process and lucky for us, it was an easy fix and none of the electrical was affected. Turns out this is a common leak in a VW T5 so google was able to shed some light on the issue. For years the drainage holes under the windscreen had been blocked up with leaves and muck, so as a result the water couldn’t drain out as it was meant to. This was causing an overflow that would trickle down under the seat and our beautiful new ply was soaking it aaalll up. So with a wee clean out and long test blast from the garden hose, we were happily screwing down our new floor and gluing on the wood-laminate.


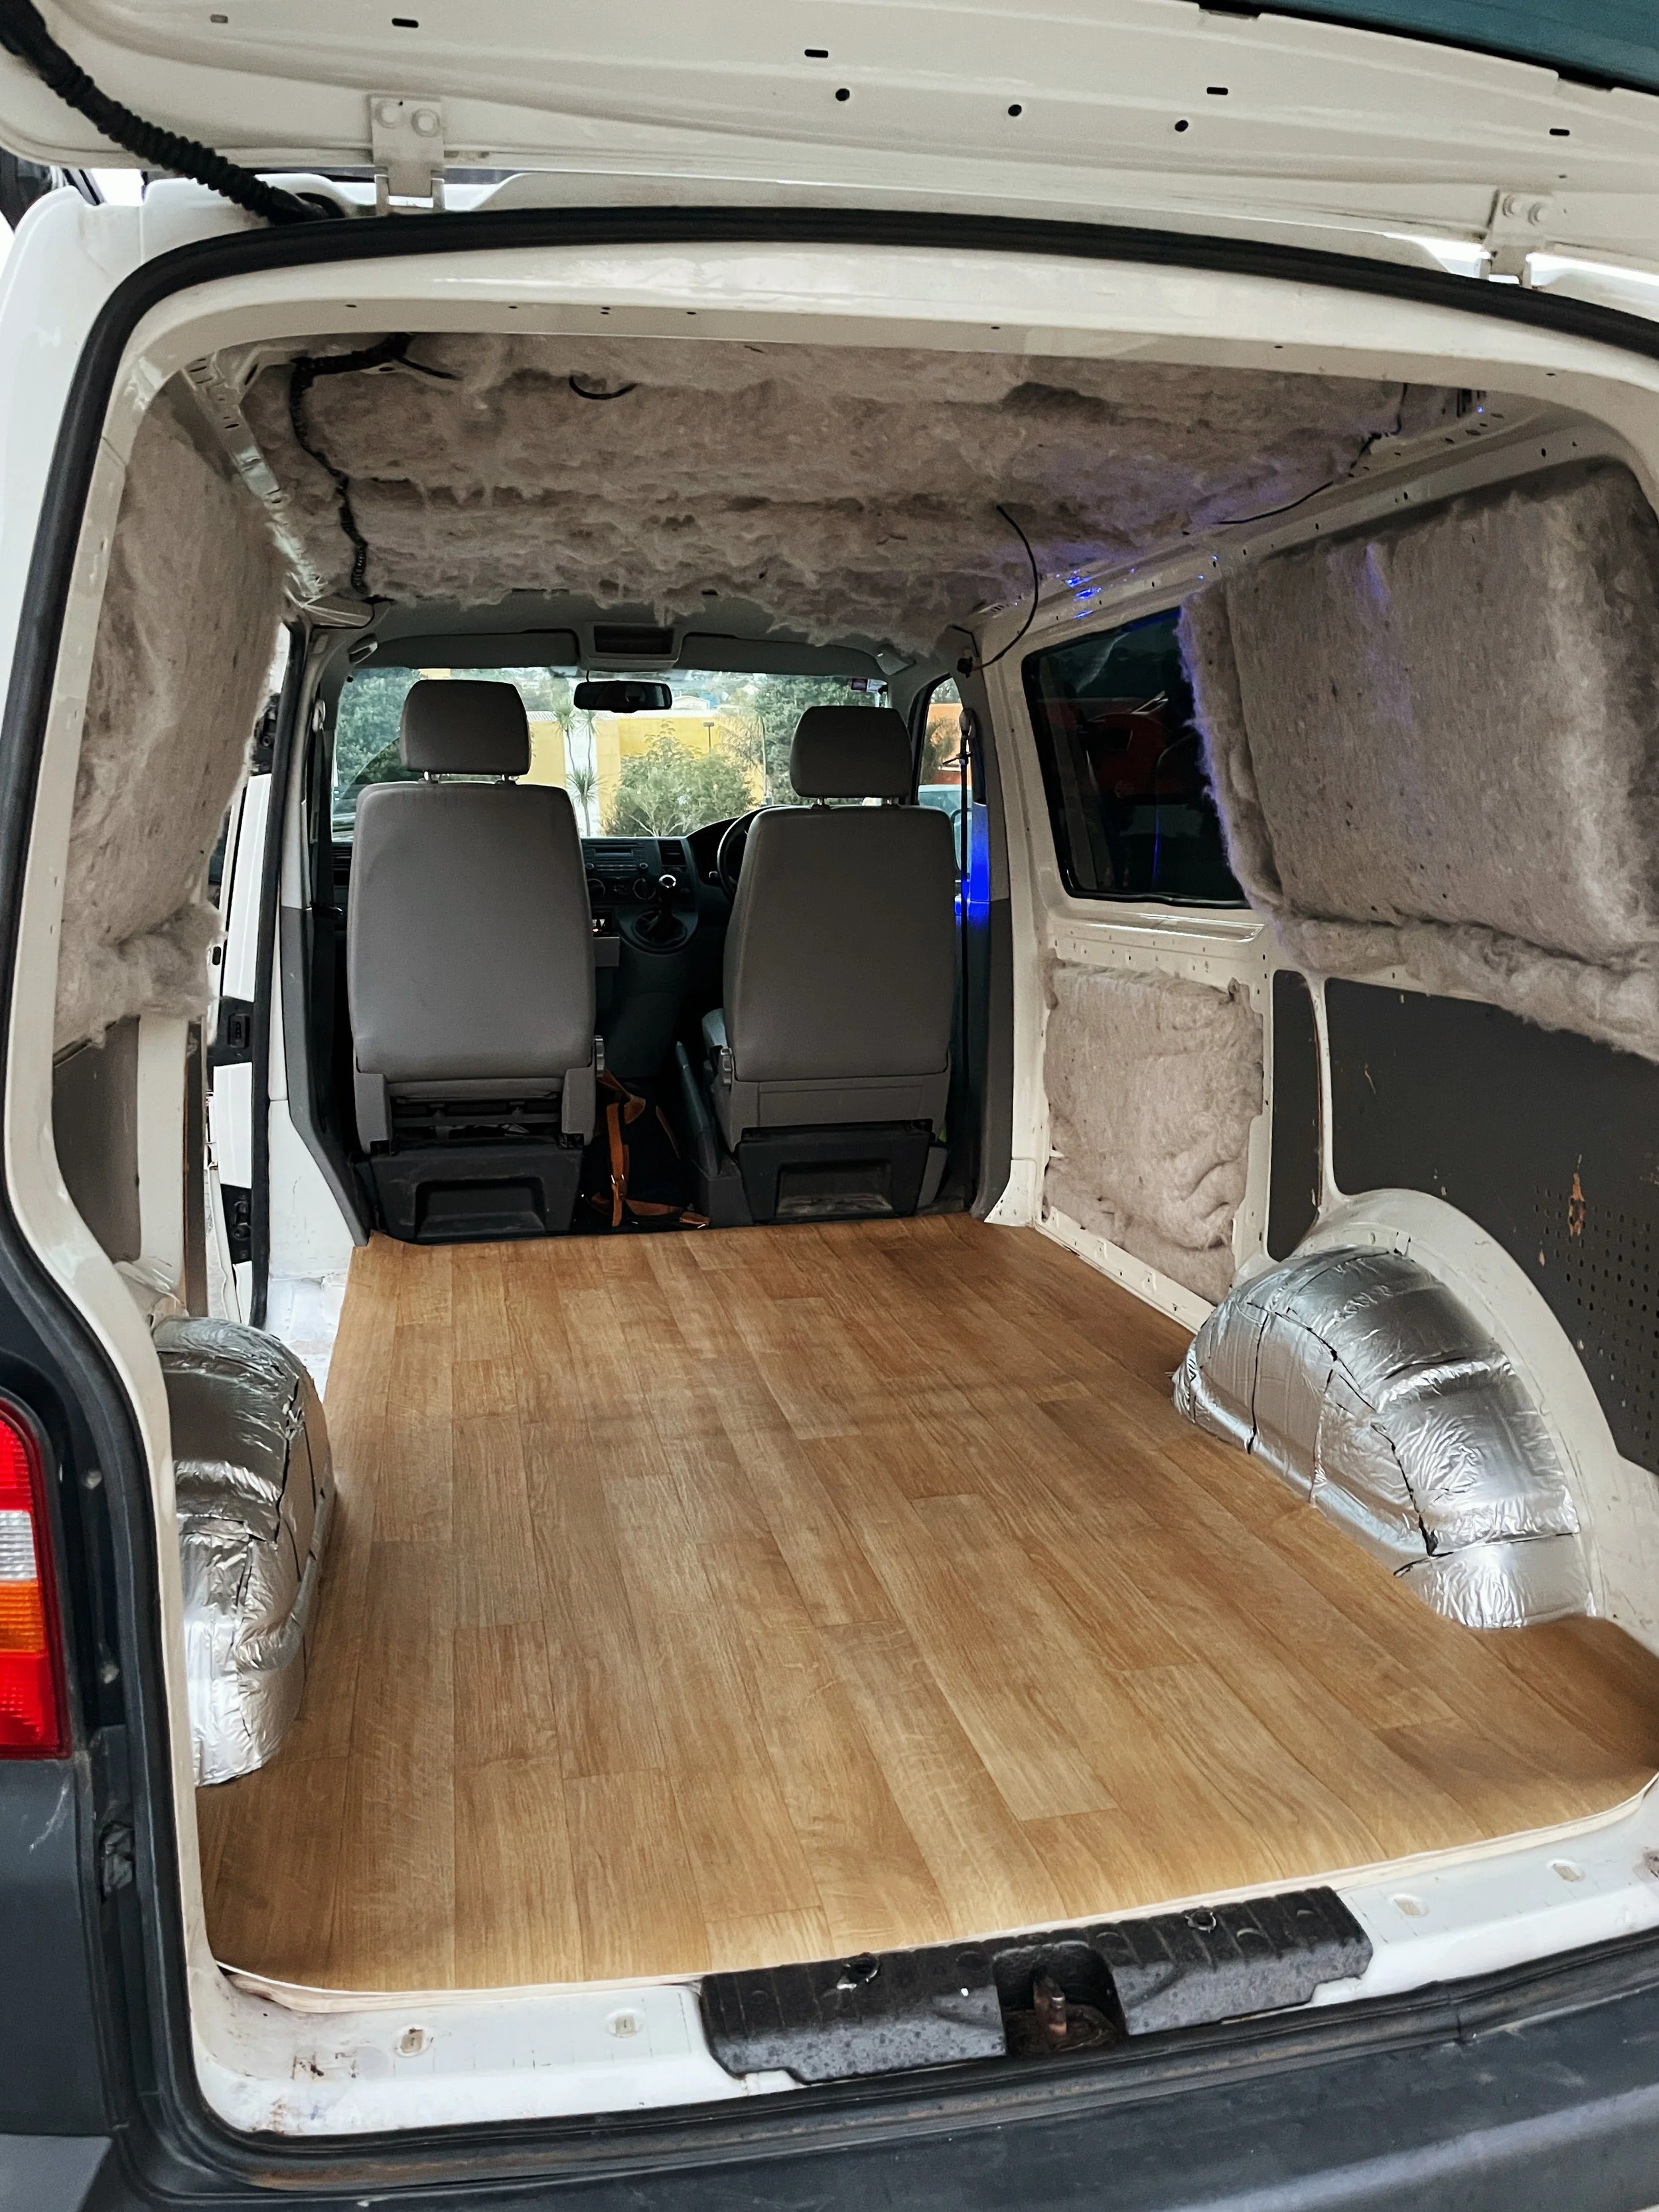
Next on the agenda was carpeting the wheel arches, wall panelling and any exposed metal that we didn’t want to see. I wanted to make the interior of the van as little like a van as possible. Which meant hiding any traces of van structure. I really wanted it to feel like a little home away from home cabin when you were inside. Our original thought was to carpet all in behind the cabinets so that when any cupboards were open, it had a tidy clean finish in behind. Turns out all my efforts were wasted as Judge & Co were just too good with the cabinetry that we didn’t end up seeing any of the wall behind. Later down the track we also ended up lining the opposite wall, so really only one wheel arch ended up being somewhat visible (under the seat). However it only took me a few hours once I figured out the 4 way stretch of the wall carpet, so not too bad!

In the meantime while all this was going on, some very exciting purchases had gone down: the sink and the all important fridge. I was keen on a nice big deep sink with a foldable tap and a cover to give the ability to hide it away and increase bench space went it wasn’t in use. All my local online searches resulted in small, expensive options that were quite frankly, fugly. After a lot of internet hours, I finally landed on this bad boy from Aliexpress (B set). Which I’m sure I found the exact same sink on a trendy NZ site for $1200. So going straight to the supplier saved us about $800.
There was no question in our minds that we wanted a Dometic fridge. They have a fantastic reputation and we were able to nab our fridge model from Marine Deals. We were really set on having a proper fridge and not a drawer or tilting system where things easily get lost in the bottom and don’t actually fit much at all. This 45L jobbie easily fits a long weekend of food for our little fam and for longer trips away we will also take our 105L Yeti.

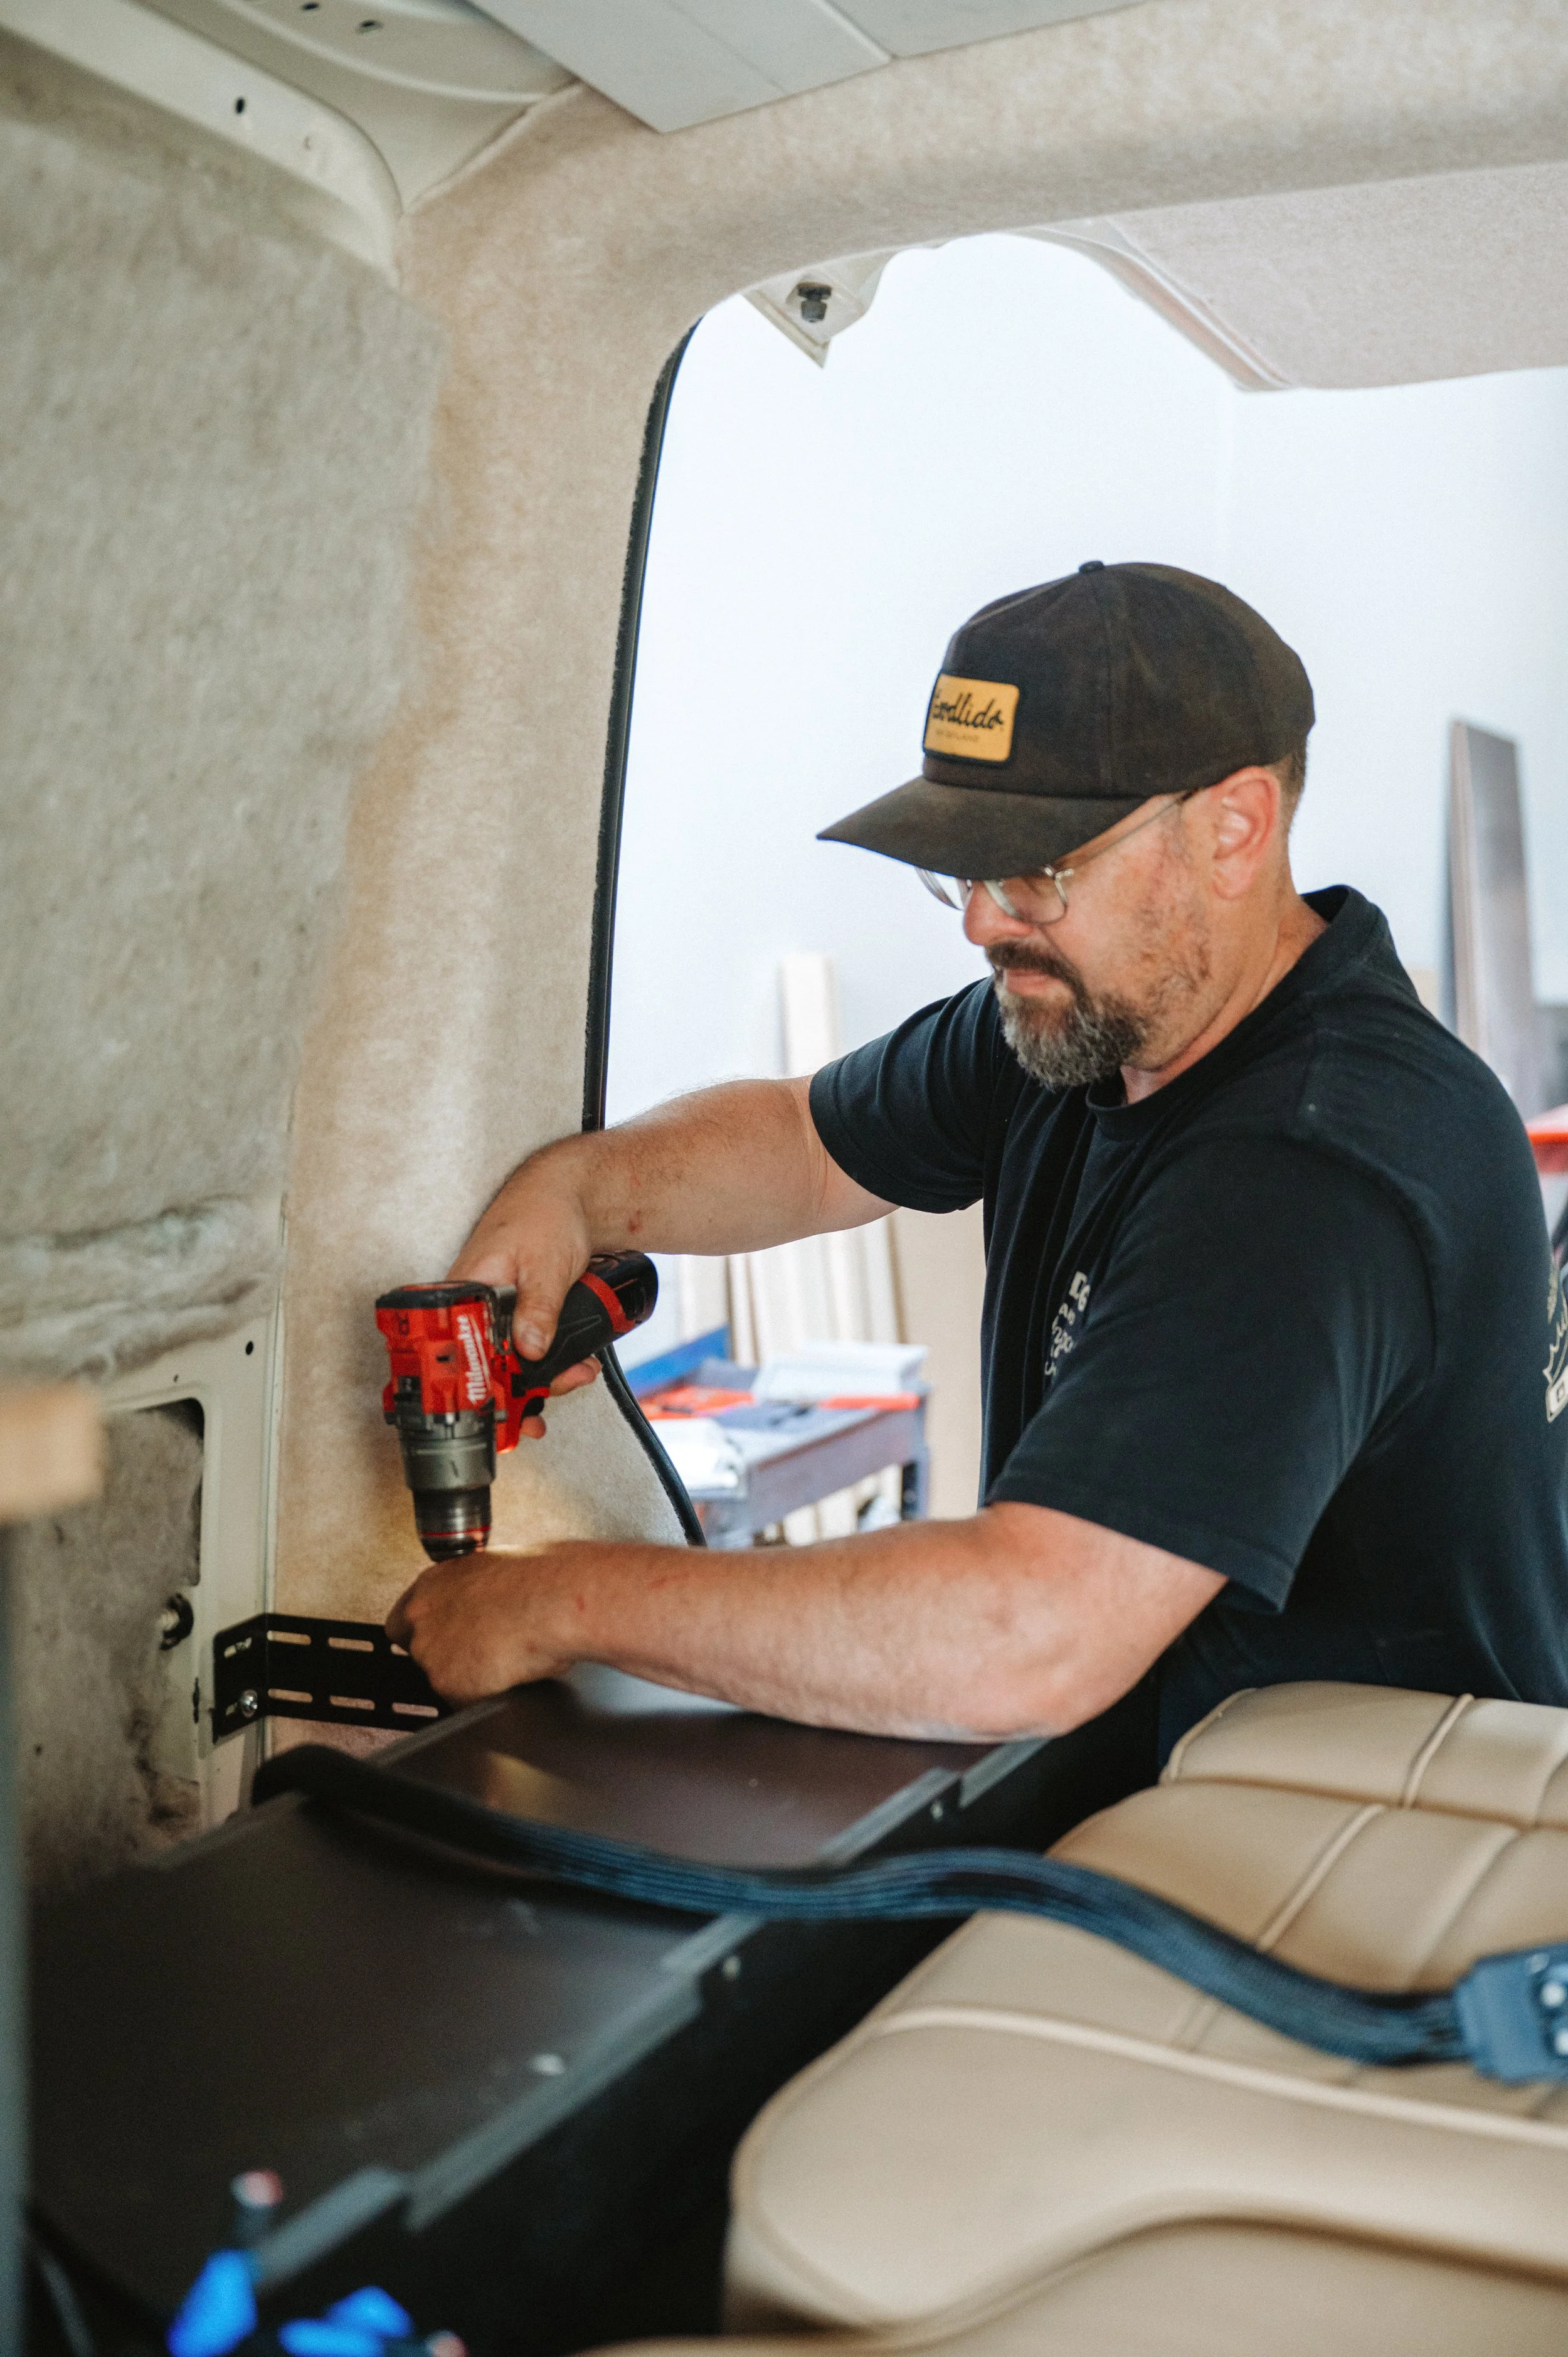
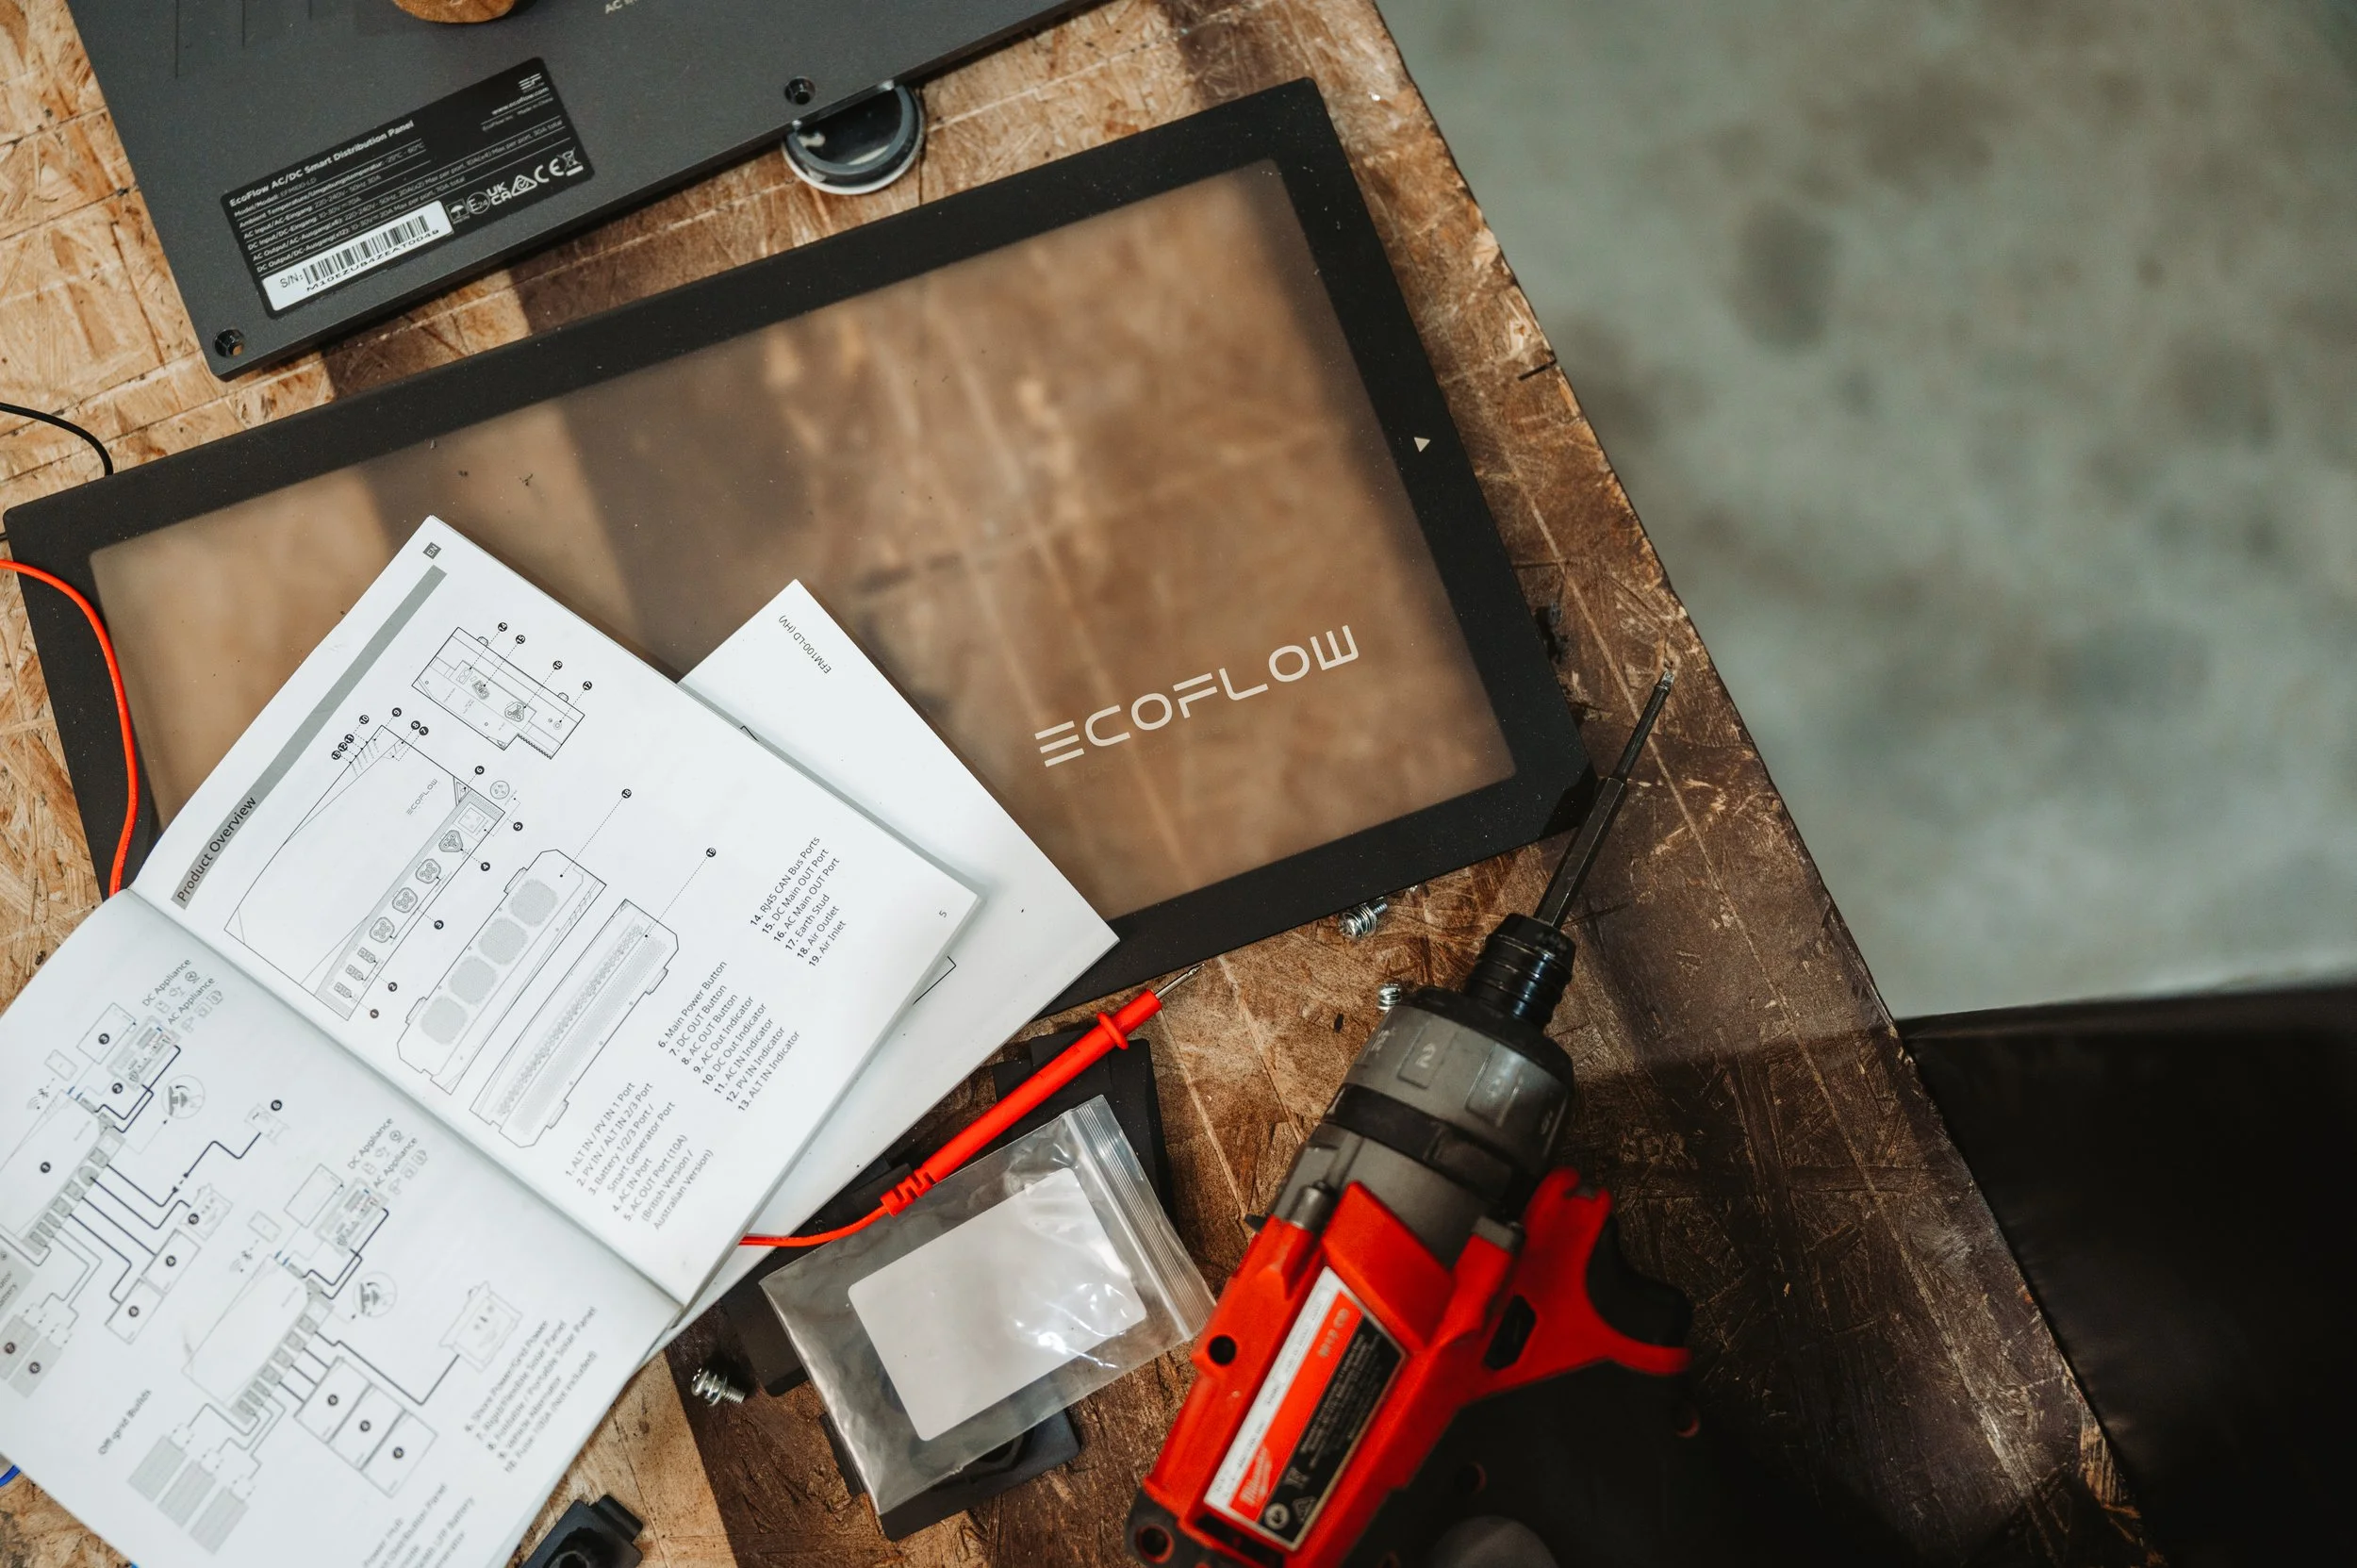
This is when it started getting really exciting as we could collect our epic Power Kit from EcoFlow (sponsored! Eee!) and begin a more realistic mapping out of our space with the actual items and painters tape. A refreshing change from just sketching random ideas on paper and sitting inside an empty van staring at the barren walls. EcoFlow hooked us up with enough juice to power us off grid for several days, so you can imagine how excited we were to get our hands on this kit. We had a general plan in mind for how we might fit everything in, but Reuben from Judge & Company came to our rescue later in the game to show us how it should really be done. The whole system had a super easy install as it’s all just plug and play (again big thanks to Reuben for rigging it all up for us as part of the cabinetry fit out!) I’ll cover off some more detail on the EcoFlow system later in the blog.


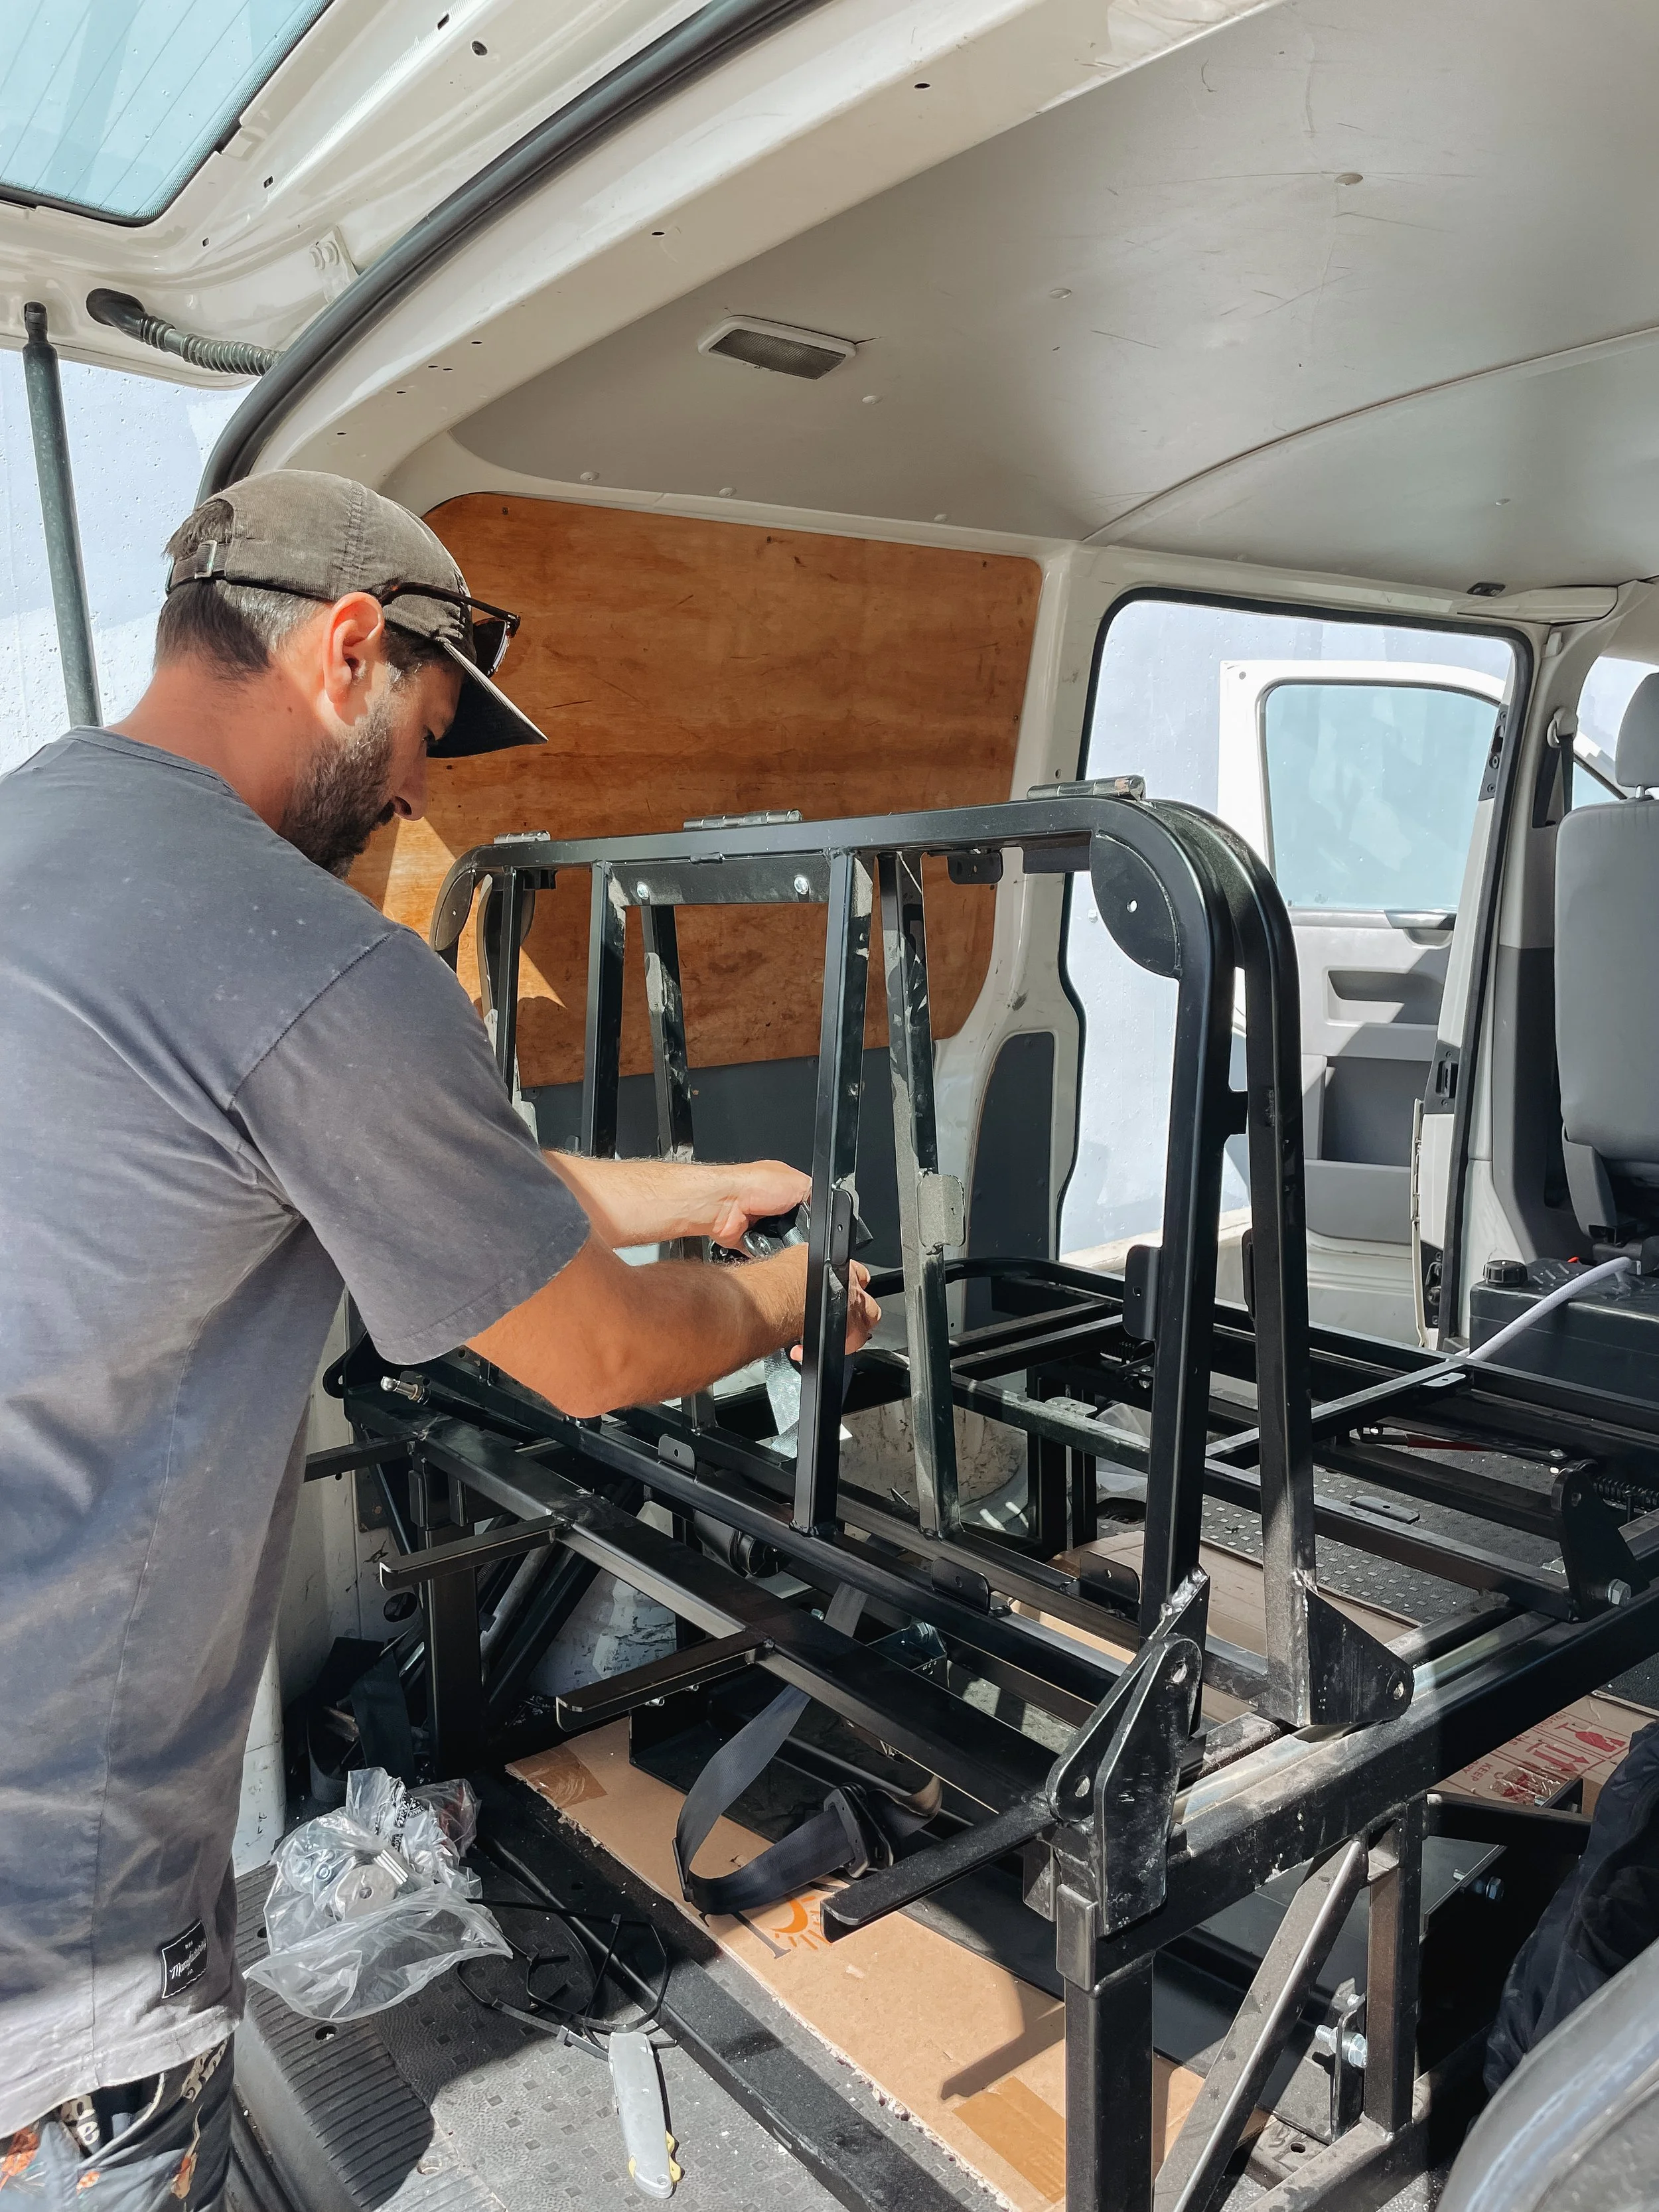
MEANWHILE, our seat had been getting upholstered and I am so stoked how it came out! We were super lucky to have a friend’s dad complete an absolute high-class job (he’s a boat upholsterer by trade), and for an epic price too. This meant we were finally all set for install, being an integral part of the whole fit out this was huge progress. Which as previously mentioned, turned into a bit of a schnitzel. Not much else could go ahead until the seat was in. The guidance we were given by a certifier did not end up being enough for certification. Rusty Lee provide paperwork for certification as their seats are thoroughly crash tested in Germany so we were assured that install would be relatively straight forward here. Fraser Cars were highly recommended to us as they work with classic cars and often deal with seat installs. Upon taking it to them, it was quickly realised the certification standards in the UK were a lot looser than here in New Zealand. This resulted in some extra custom steel brackets being made and a few more extra materials required than what was provided with the seat. Anyone taking on a camper build will know any custom work comes at a juicy price - for good reason, but woooof. Lucky for us, the Fraser Cars crew were super understanding and worked with us on this conundrum really well.
For context, there is a huge steel plate that sits under the chassis and the seat framing gets screwed into this - the seat is then to be bolted through the floor into the steel plate. While I am definitely stoked with the level of safety required in New Zealand, the certifier advising the boys at Fraser Cars kept coming back with additional things to remedy such as adding crush tubes into the voids of the van floor to give extra strength in the case of a crash. As a result, the extra custom work meant the bill just kept going up and up. I mean, totally fair as you don’t want to be the certifier on the wrong side of a seat flying off during an accident and running the risk of being responsible for a serious injury or death. At the end of the day, we are grateful to have a very safe, secure seat. Especially considering we are strapping the most precious cargo known to man to it (aka our child). But if you are embarking on a journey similar to ours, beware that you’ll need a healthy budget before you’ve even thought about cabinets, fridges and cute little roll up blinds. It pains me to even recall how much the seat cost, so if you really want to know, just email or DM me and I can give you the details. However, the value of the seat has made it all worth it in the long run. Now having a safe AF seat that doubles as a bed has already bought us so much joy on the adventures we’ve had so far.

Our last task before getting the van over to Judge & Company for cabinetry & electrical goodness, was the ceiling. And mates, the fight that I fought to have a tongue & groove ceiling was foughted with passion. My husband is the more sensible one out of the two of us and for budgeting reasons (thanks seat install) really wanted to either leave the ceiling as is, or carpet it. But my daydreams I had for our little home on wheels were relentless and I wasn’t letting go of my vision. Long story short, we have a tongue & groove ceiling now. This was achieved by screwing some battens in to the celling and then fastening our tongue & groove timber onto that. This process also included drilling out our LED light holes down the middle plank and getting some pre-wiring sorted. Guess who’s husband is super stoked with the result now.


Ok now for the most exciting part. After a couple of layout/design consultations with Reuben at Judge & Company, it was time to get stuck into the gooooods. I’m blessed to have known Reuben for many laps of the sun so can vouch for him being a most excellent egg. So I’ve been lucky enough to partner with Judge & Co before - the team fitted our kitchen drawer system in our Land Cruiser so knew from experience that they operate to a very high-standard and work quickly and efficiently. While we had a general idea on layout, we also gave Reuben some creative freedom to come up with some awesome storage and functional features. And he did not disappoint. After the van being with the crew for just a couple of days, I couldn’t believe how much progress they had made, the infinitely better plan of fitting in our EcoFlow power kit and the f*ckin cool little design features that Reuben was coming up with on the fly. A wee pull out desk, perfectly appointed water storage, under-seat drawers, the insanely cool pull out table and storage out the back complete with decor shelves and discrete hidden cable storage. My expectations had already been seriously surpassed and we were still only at the carcass stage of the whole process. Judge & Co have an in-house CNC machine which means they are able to absolutely rip through work, but also ensure they are creating top of the line product.
Because the Judge & Company crew are also trained and super knowledgable with the electrical/wiring side of things, we were happy to turn this job over to them too. Here’s a few words from Reuben about installing the EcoFlow system from their own blog write up here: https://judgeandco.nz/blogs/news/bts-judge-and-co-campaign-shoot
“This system has 12v and 230v power supply and has AC, DC and solar charging capabilities. All controlled by a nice touch screen panel or from a phone app. Some would say this is overkill for NZ touring, but man was the install and integration straightforward. Also, having plenty of head room, should it be required in the future, is always nice.”
The whole renewable energy system is modular and really scalable by just adding additional batteries, which means we can transfer it all to a bigger camper in the future or even a tiny home. The dual voltage option means we could add in a standard New Zealand wall plug above the bench, resulting in easy charging of phones, camera batteries, laptops and even running a blender or air fryer for some boujee glamping. It’s all charged up by either our EcoFlow solar panel or the alternator via the van running. So when we aren’t harnessing the sun for eco-friendly power then the batteries are getting juiced up while we travel around. You can read about all the specs here: https://ecoflowtech.co.nz/pages/power-kits
Here’s what went down in picture-story form… (a more in-depth YouTube video to come, even with some commentary from the legend himself - Reuben of Judge & Co)


Before I knew it, we were at the cupboard fronts stage. The Judge & Co crew got the CNC machine to work, perfectly cutting out the cupboard shapes from a beautiful blonde wood sealed ply. From the beginning I had the vision of rattan fronts for not only the look it provides, but to also minimise weight where possible in the van and break up the look of all the wood grain. I bought some gorge handmade rattan from Vietnam on Etsy. It arrived with a lovely had-written note from the makers about how the rattan was made by elderly members of their community and how the purchase allows them to continue to be creative and be contributing members of their society, which they were super grateful for.


By this stage the boys had made huge progress in just one week (on the run up to Christmas with other fit outs going on at the same time might I add!) So it was time to take the van home for the weekend, paint up the ceiling and get the opposite wall all lined up. We didn’t use a traditional ceiling paint as it can get scuffed up pretty easily, so we went for a semi-gloss door paint. This means it will be much easier to wipe clean any marks or sticky fingerprints.
I was also introduced to the difficulty of templating a van wall. Thanks to the ever changing lines and the wheel arch, it proved to be a challenge. Nothing a bit of No More Gaps and a lick of paint couldn’t fix in the end!


It was then back to the Judge & Co workshop for the under seat drawer systems, Reubens sick as shelving/pullout table storage situation at the back and the finishing touches on plumbing & electrical.


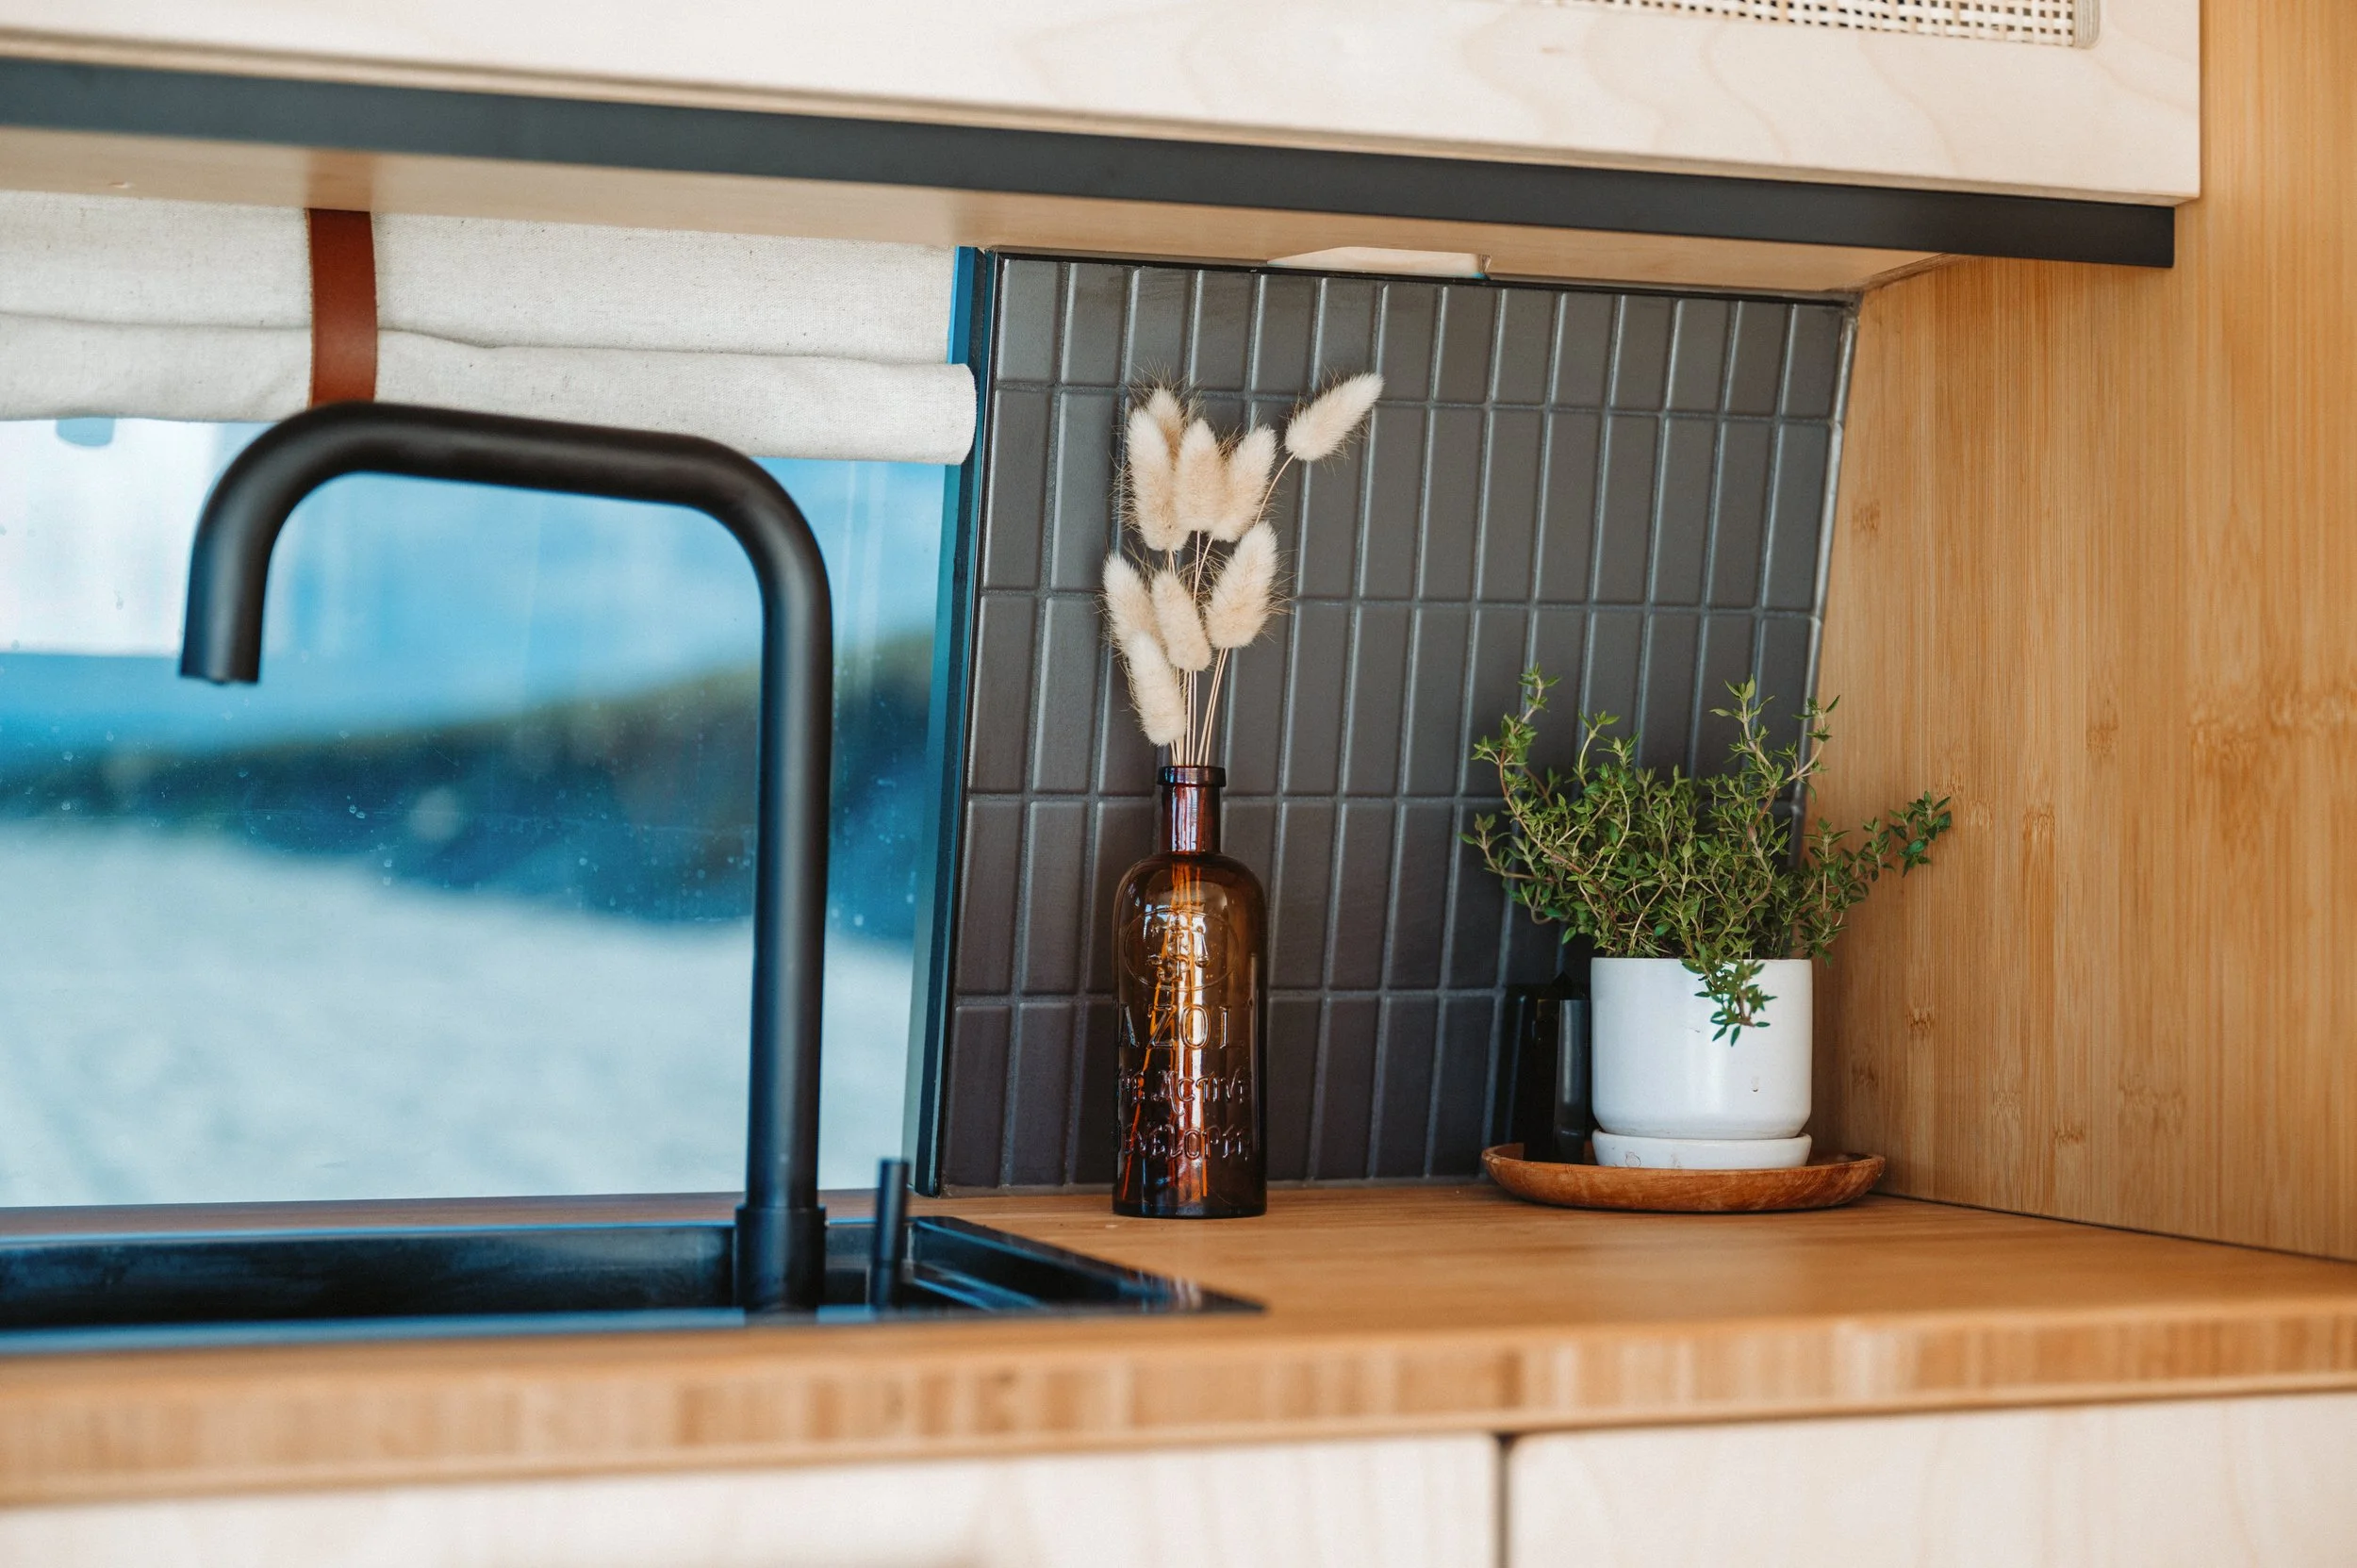
Meanwhile I had been on the hunt for some small tiles for a backsplash above the bench. I wanted to give a homely kitchen feel, but also felt like the ply needed to be broken up a bit. We went for a small black tile to match the under-seat drawers and black framing of the seat.
Reuben had also sourced some epic bamboo for the bench top which I instantly set out on a mission to find the perfect stain for. Any stain or oil I tried just wasn’t right (often too dark) so we ended up getting some beeswax from Bunnings which was perfect. It sealed the bamboo, gave the bamboo just the right colour and is super easy to re-apply when needed. These are the types of things during a camper build that you won’t realise rack up your final bill. I would have easily spent over $120 on stains and oils before finding the right look. It all stacks up!
At the time we were living in Mangawhai so enlisted the help of a very talented Tiler - Louis Morrow from Simply Splashbacks. I highly recommend working with Louis if you live in the Northland area and need a Tiler. My usual experience with tradies is they often don’t communicate the extent of the work well enough, why it costs what it does and where additional costs may apply. Louis’ communication was bang on from the start - transparent pricing and a full run down of what he would be doing at each stage. This was a specialised job as he was tiling into a space that would be moving (6 months in so far and no issues!) He absolutely nailed a flawless finish and I’m so stoked we went for this addition to the van. (I paid full price for this service, we are just so stoked with it he deserved a shout out!)


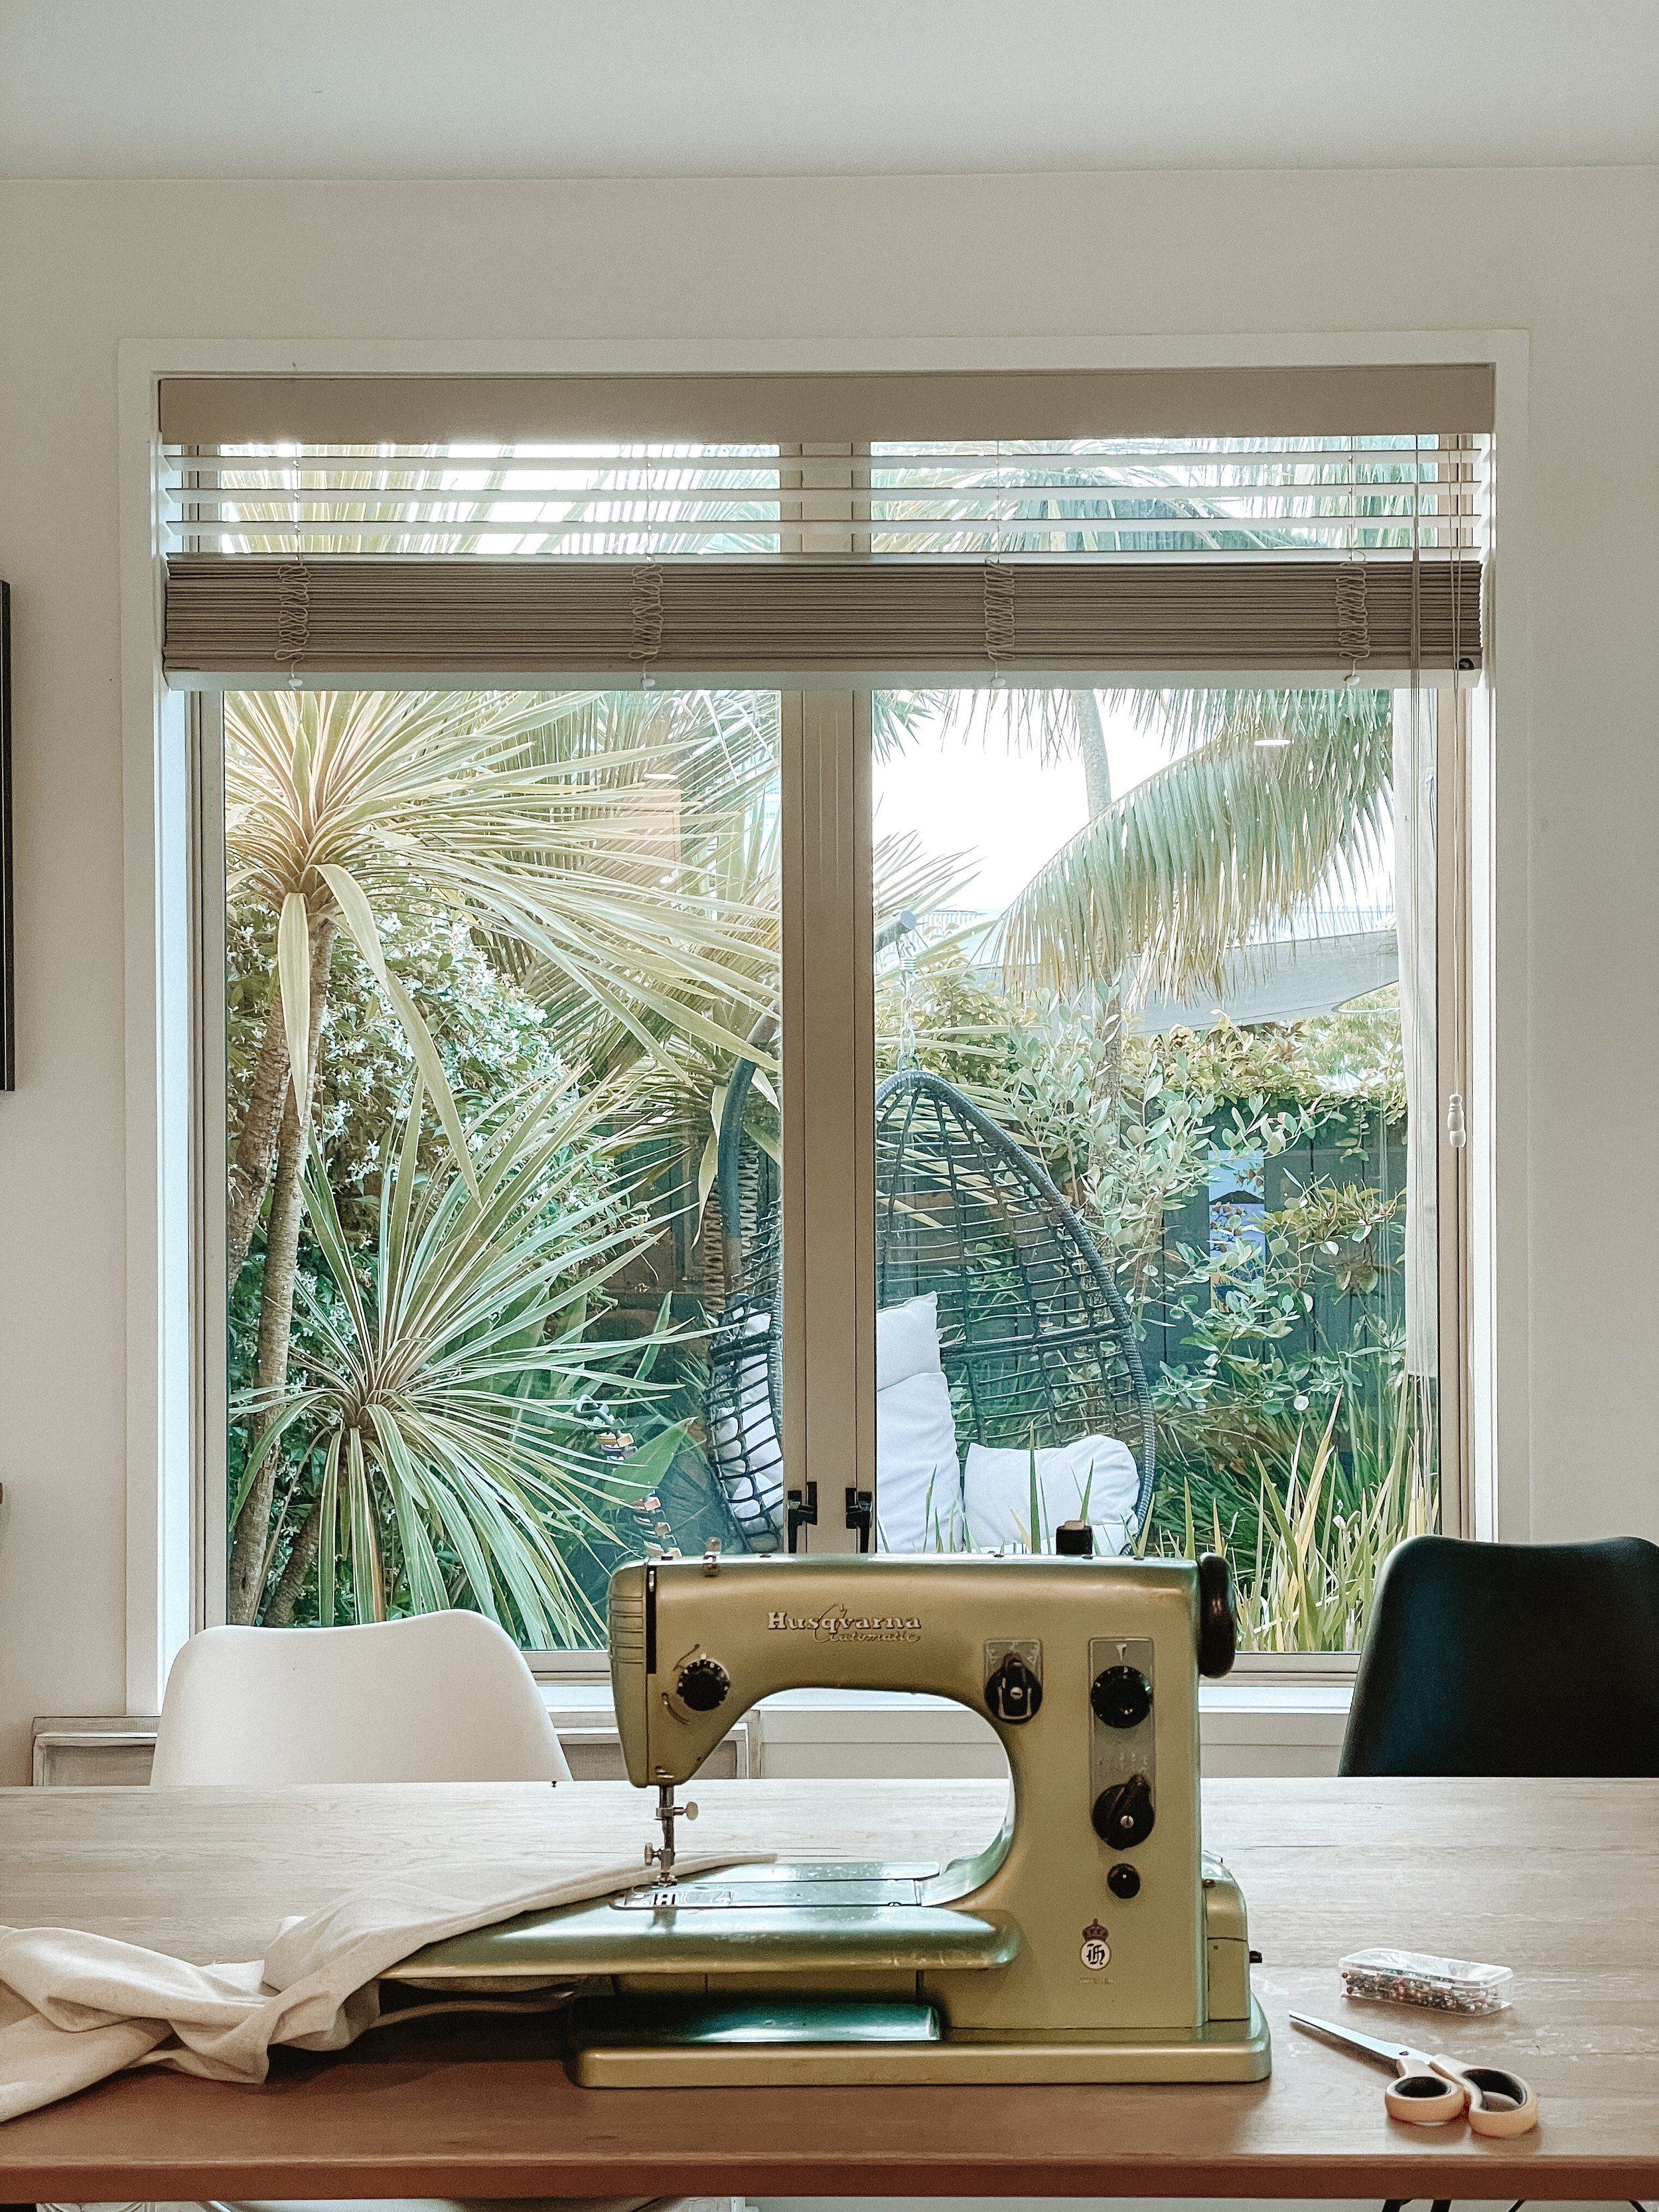
It was then time for some final touches: leather handle pulls, DIY blind (using my Grandmas Husqvarna 1950s sewing machine) tea towel rail, mozzie net test, in-cupboard storage and finally putting all my little purchases I’ve mad along the way into place.
- Cups, bowls and food went into the overhead cupboards
- Cleaning stuff, gas bottle, spare tea towels etc in cupboard under the sink
- Kitchen drawer turned into a bit of a miscellaneous storage for first aid, film, toothbrushes (we have a Front Runner Utensil set that lives in the back drawer so didn’t need this space for cutlery)
_ Sliding door cupboard contains the power system on the lower shelf and the remaining 2 shelves is our wardrobe. We use packing cells to ensure it doesn’t become a mess of clothes in there. I love the sliding doors (again Reubens idea as I had always assumed they would swing out) because it means we can still access this cupboard regardless of the seat being up or down.
- Under seat drawer in the cabin area is our pantry.
- Drawer out the back is for the gas cooker, pots & pans, cutlery and utensils
- Shelving out the back is for special decor tings we find on our travels, plus solar panel cable storage in a little hidden cubby hole.
- Epic pull out table/drawer has space in underneath for all of our cooking oils, herbs & spices and condiments for ease when cooking.


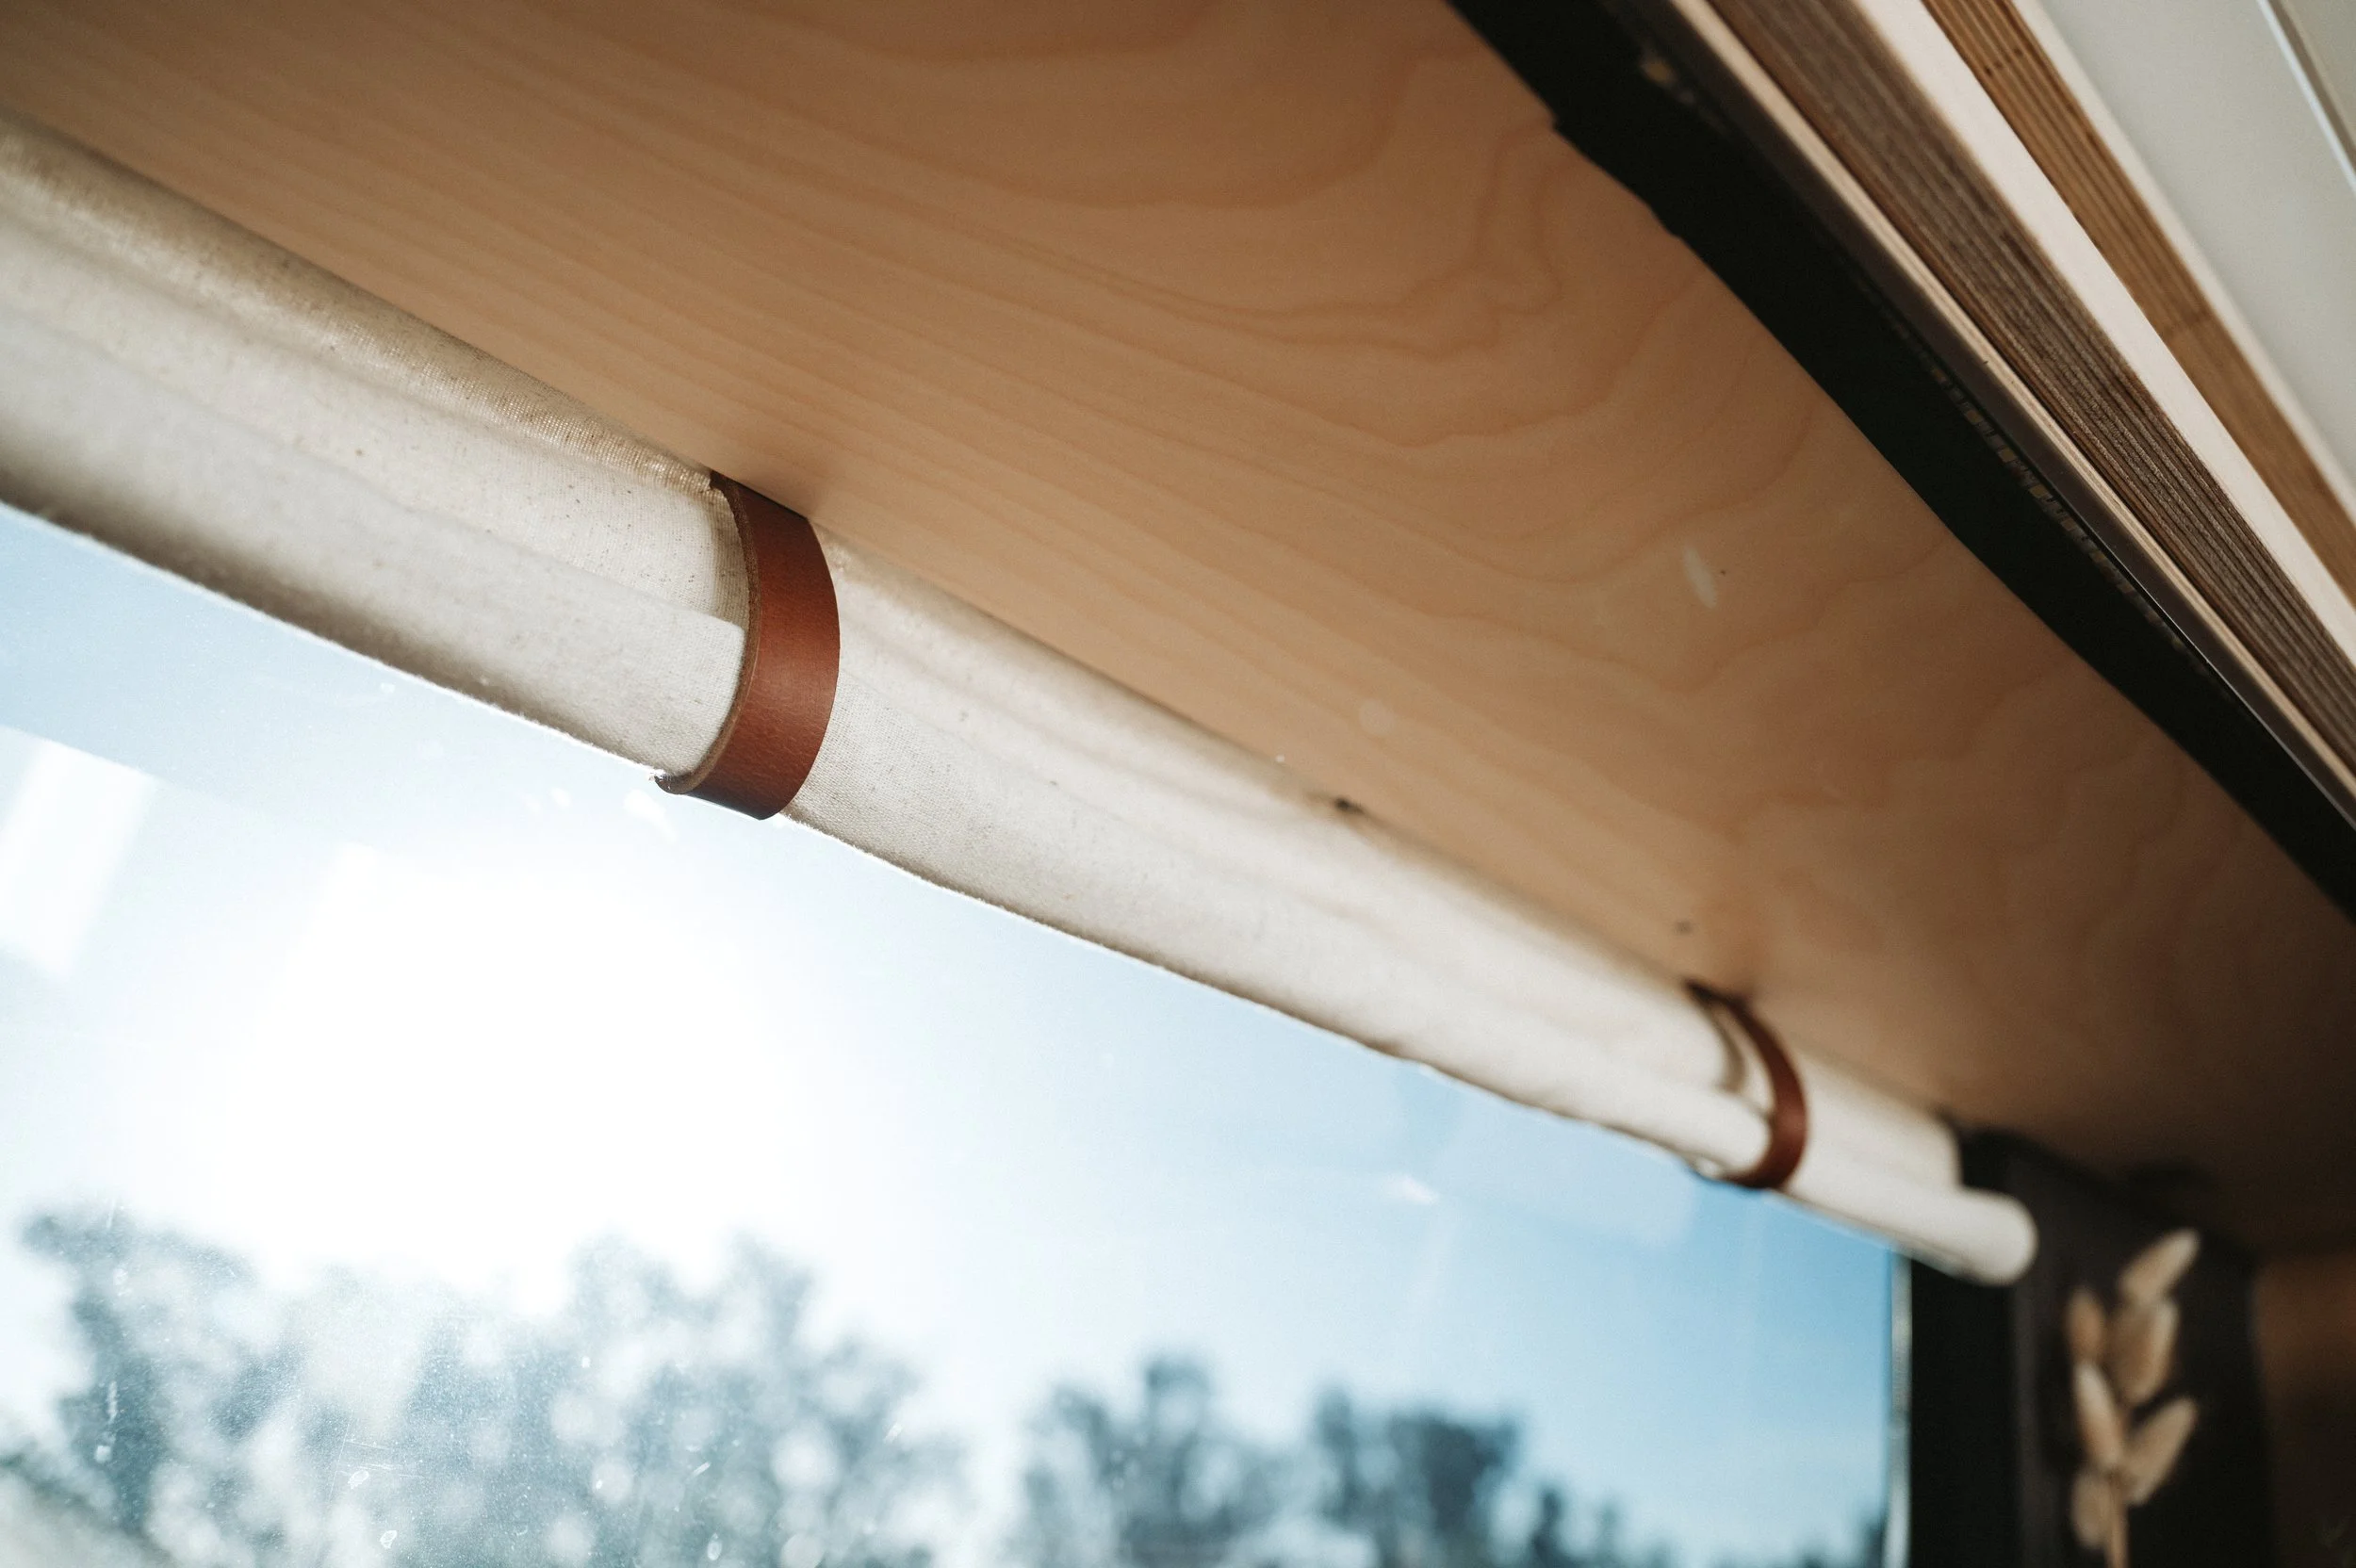
Blind plans came from Surf Bus Project - https://surfbusproject.com/product/roll-up-blinds/. Thanks guys, worked a treat!
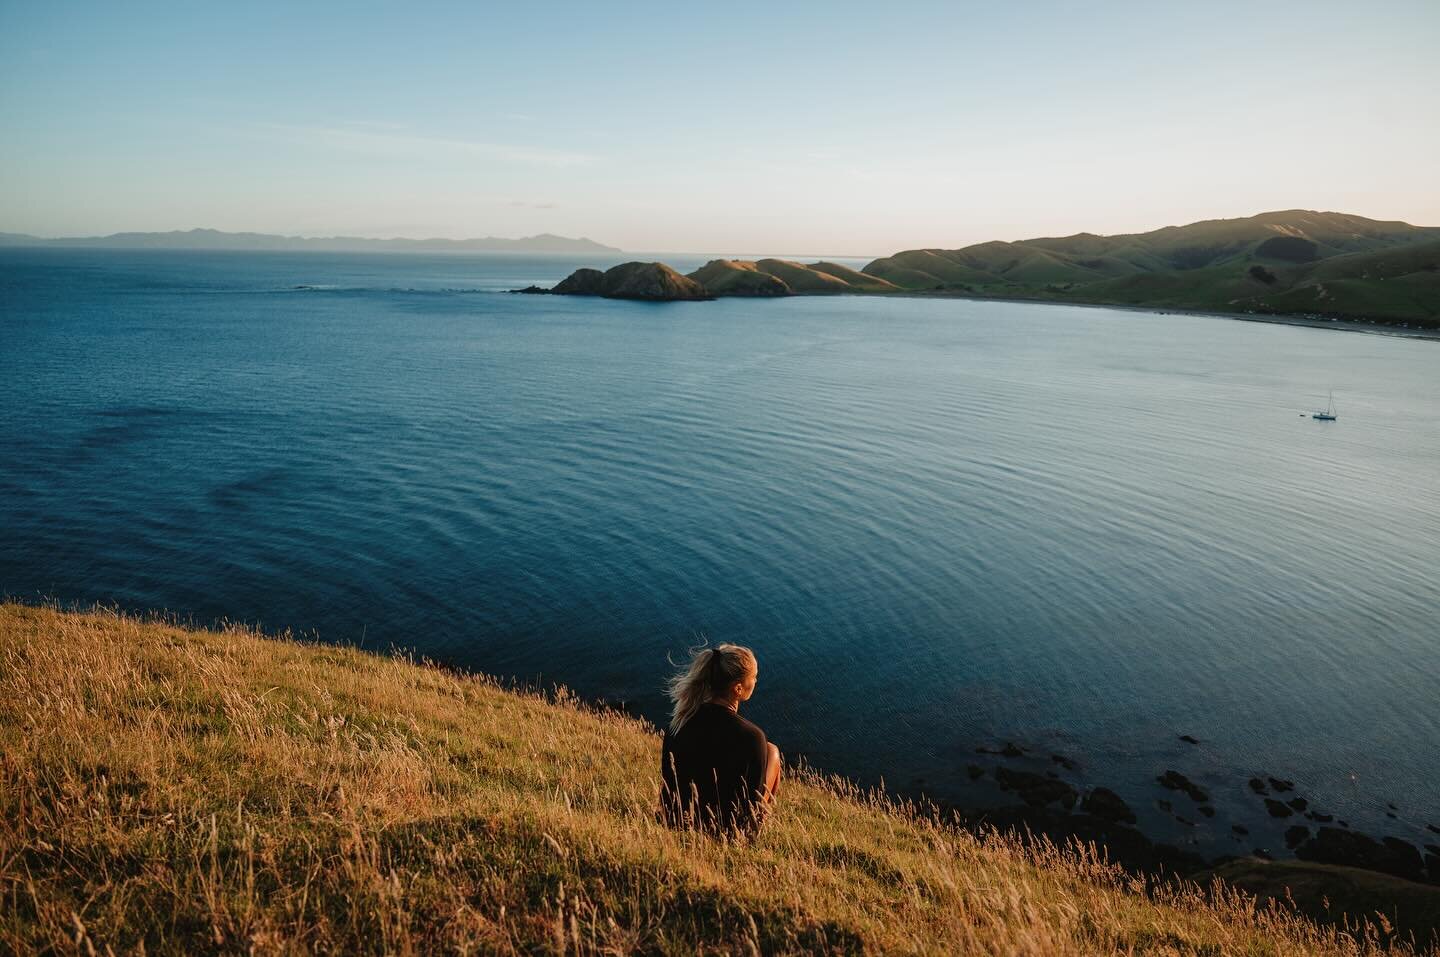
Finally we were finished! And just in time for the vans maiden voyage to Port Jackson, Coromandel. Check out the finished product and a few little adventures we’ve been on already!


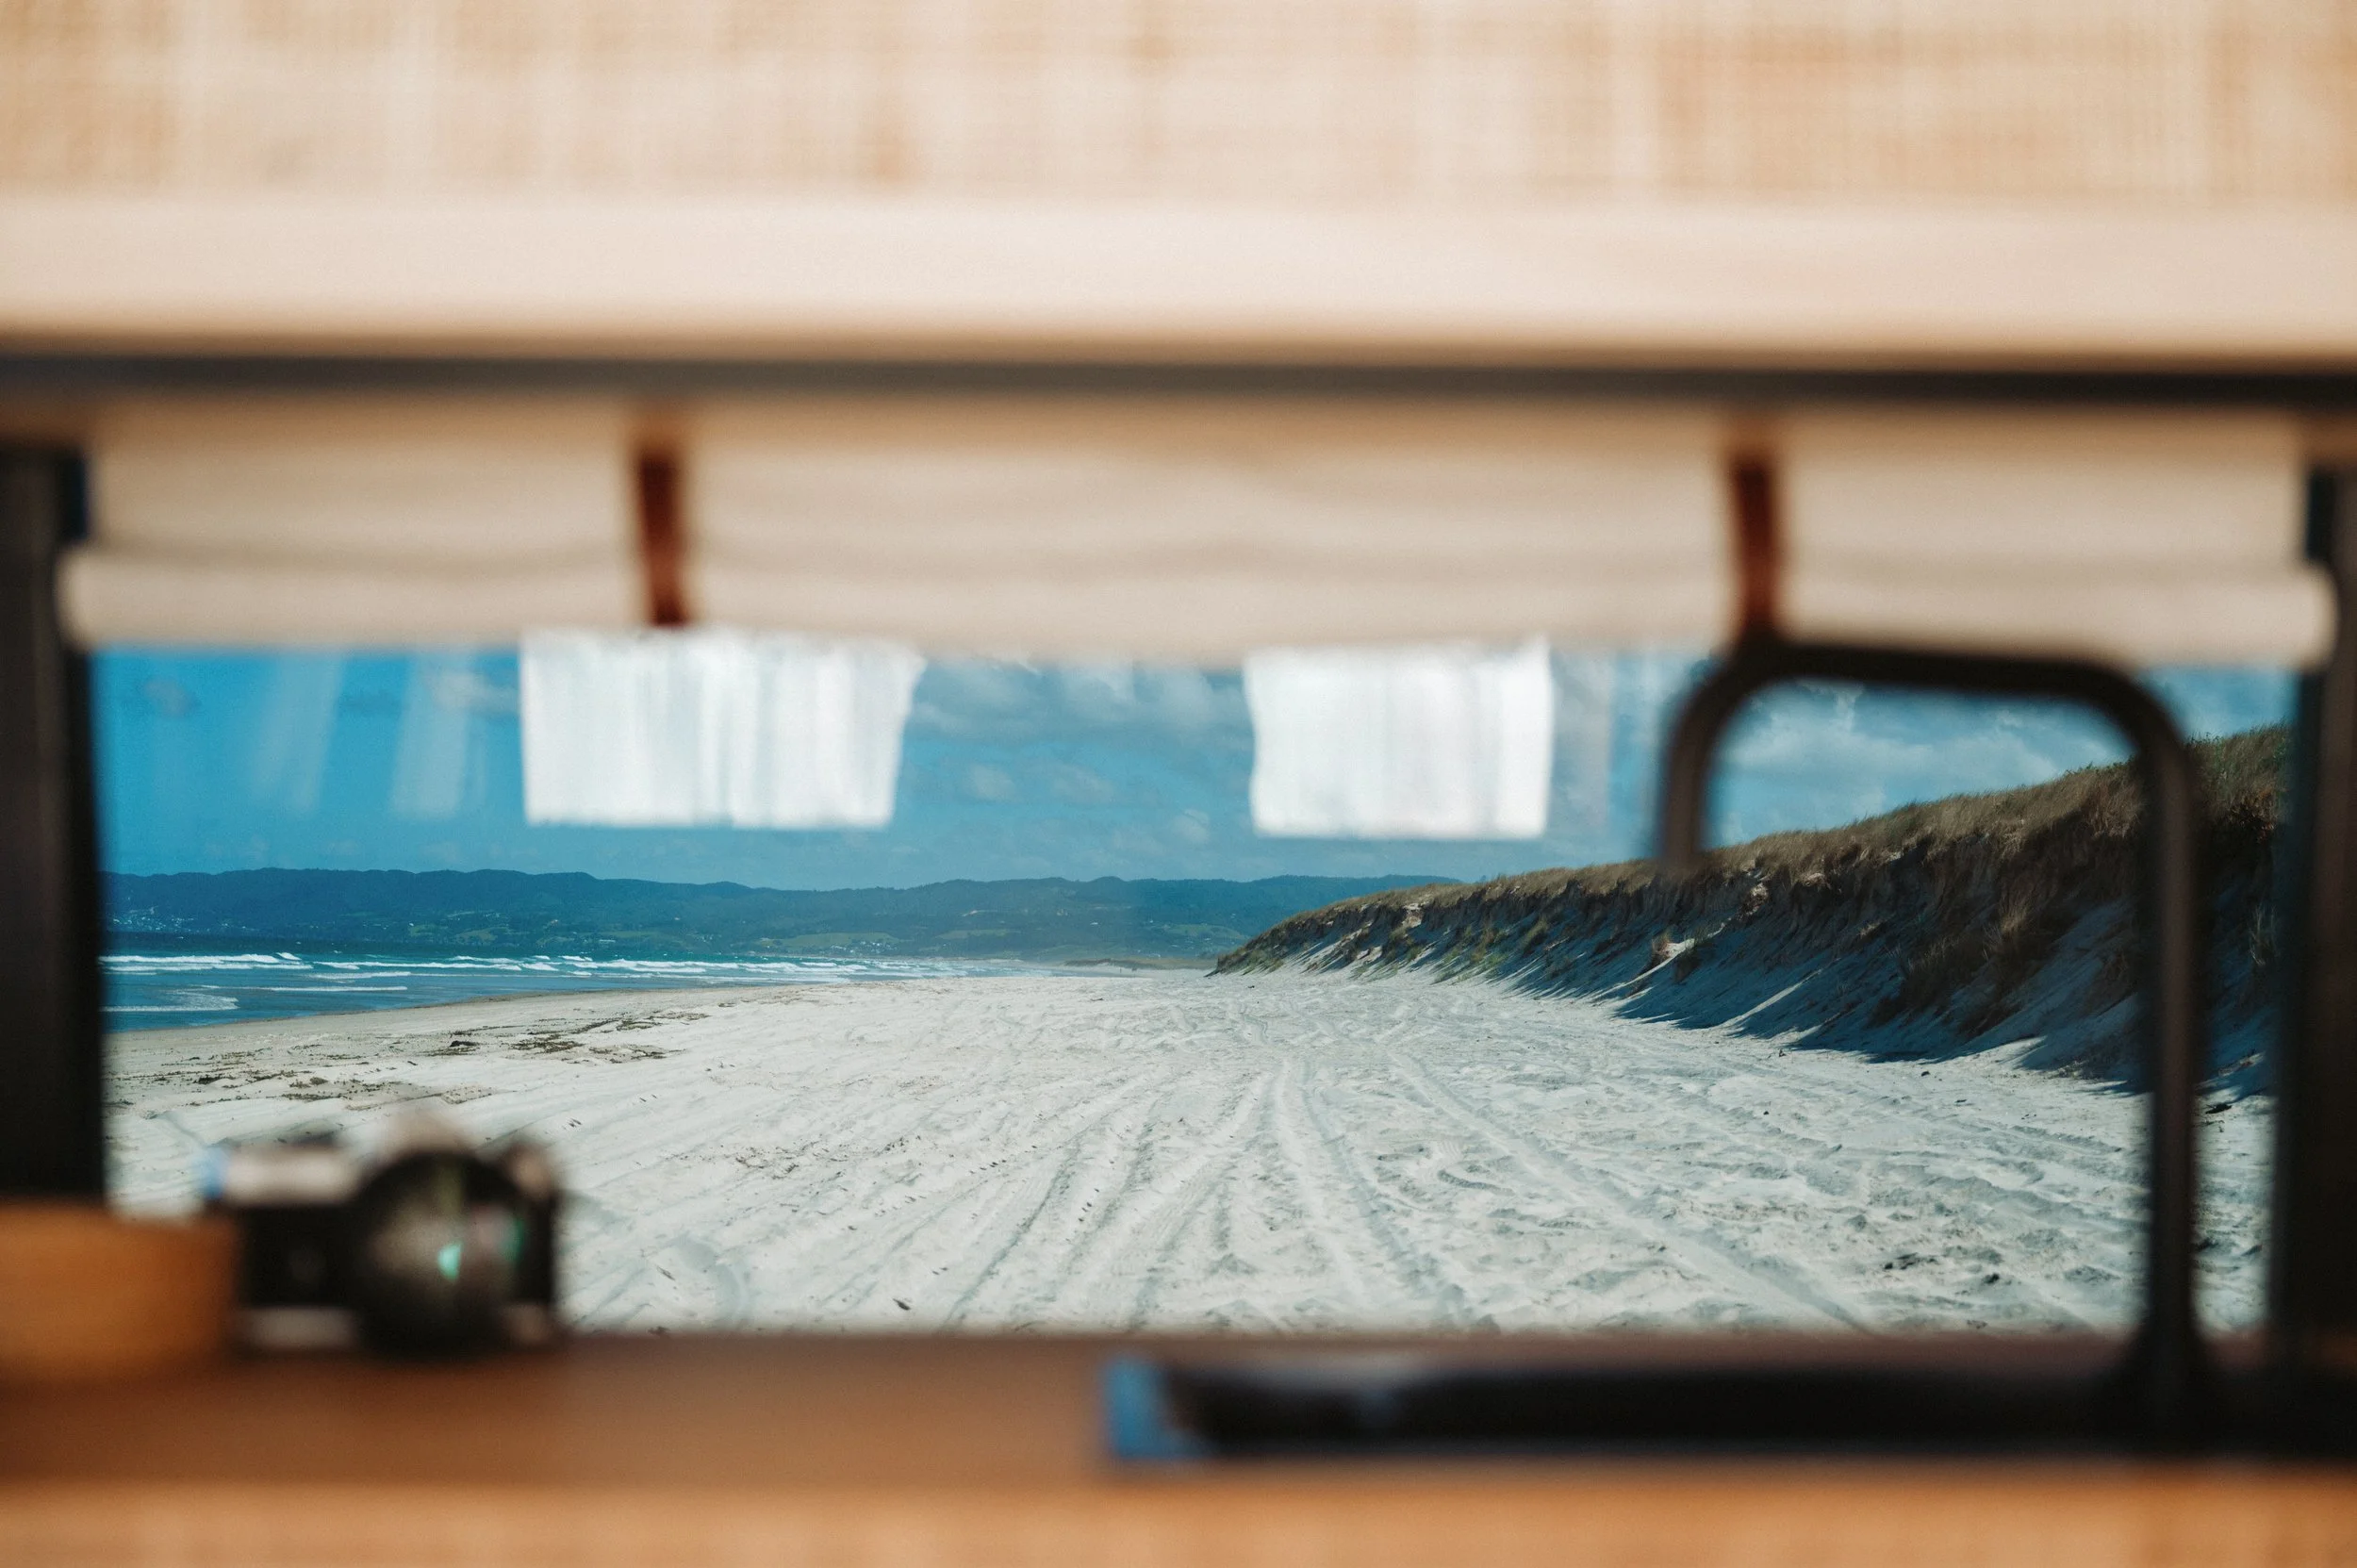


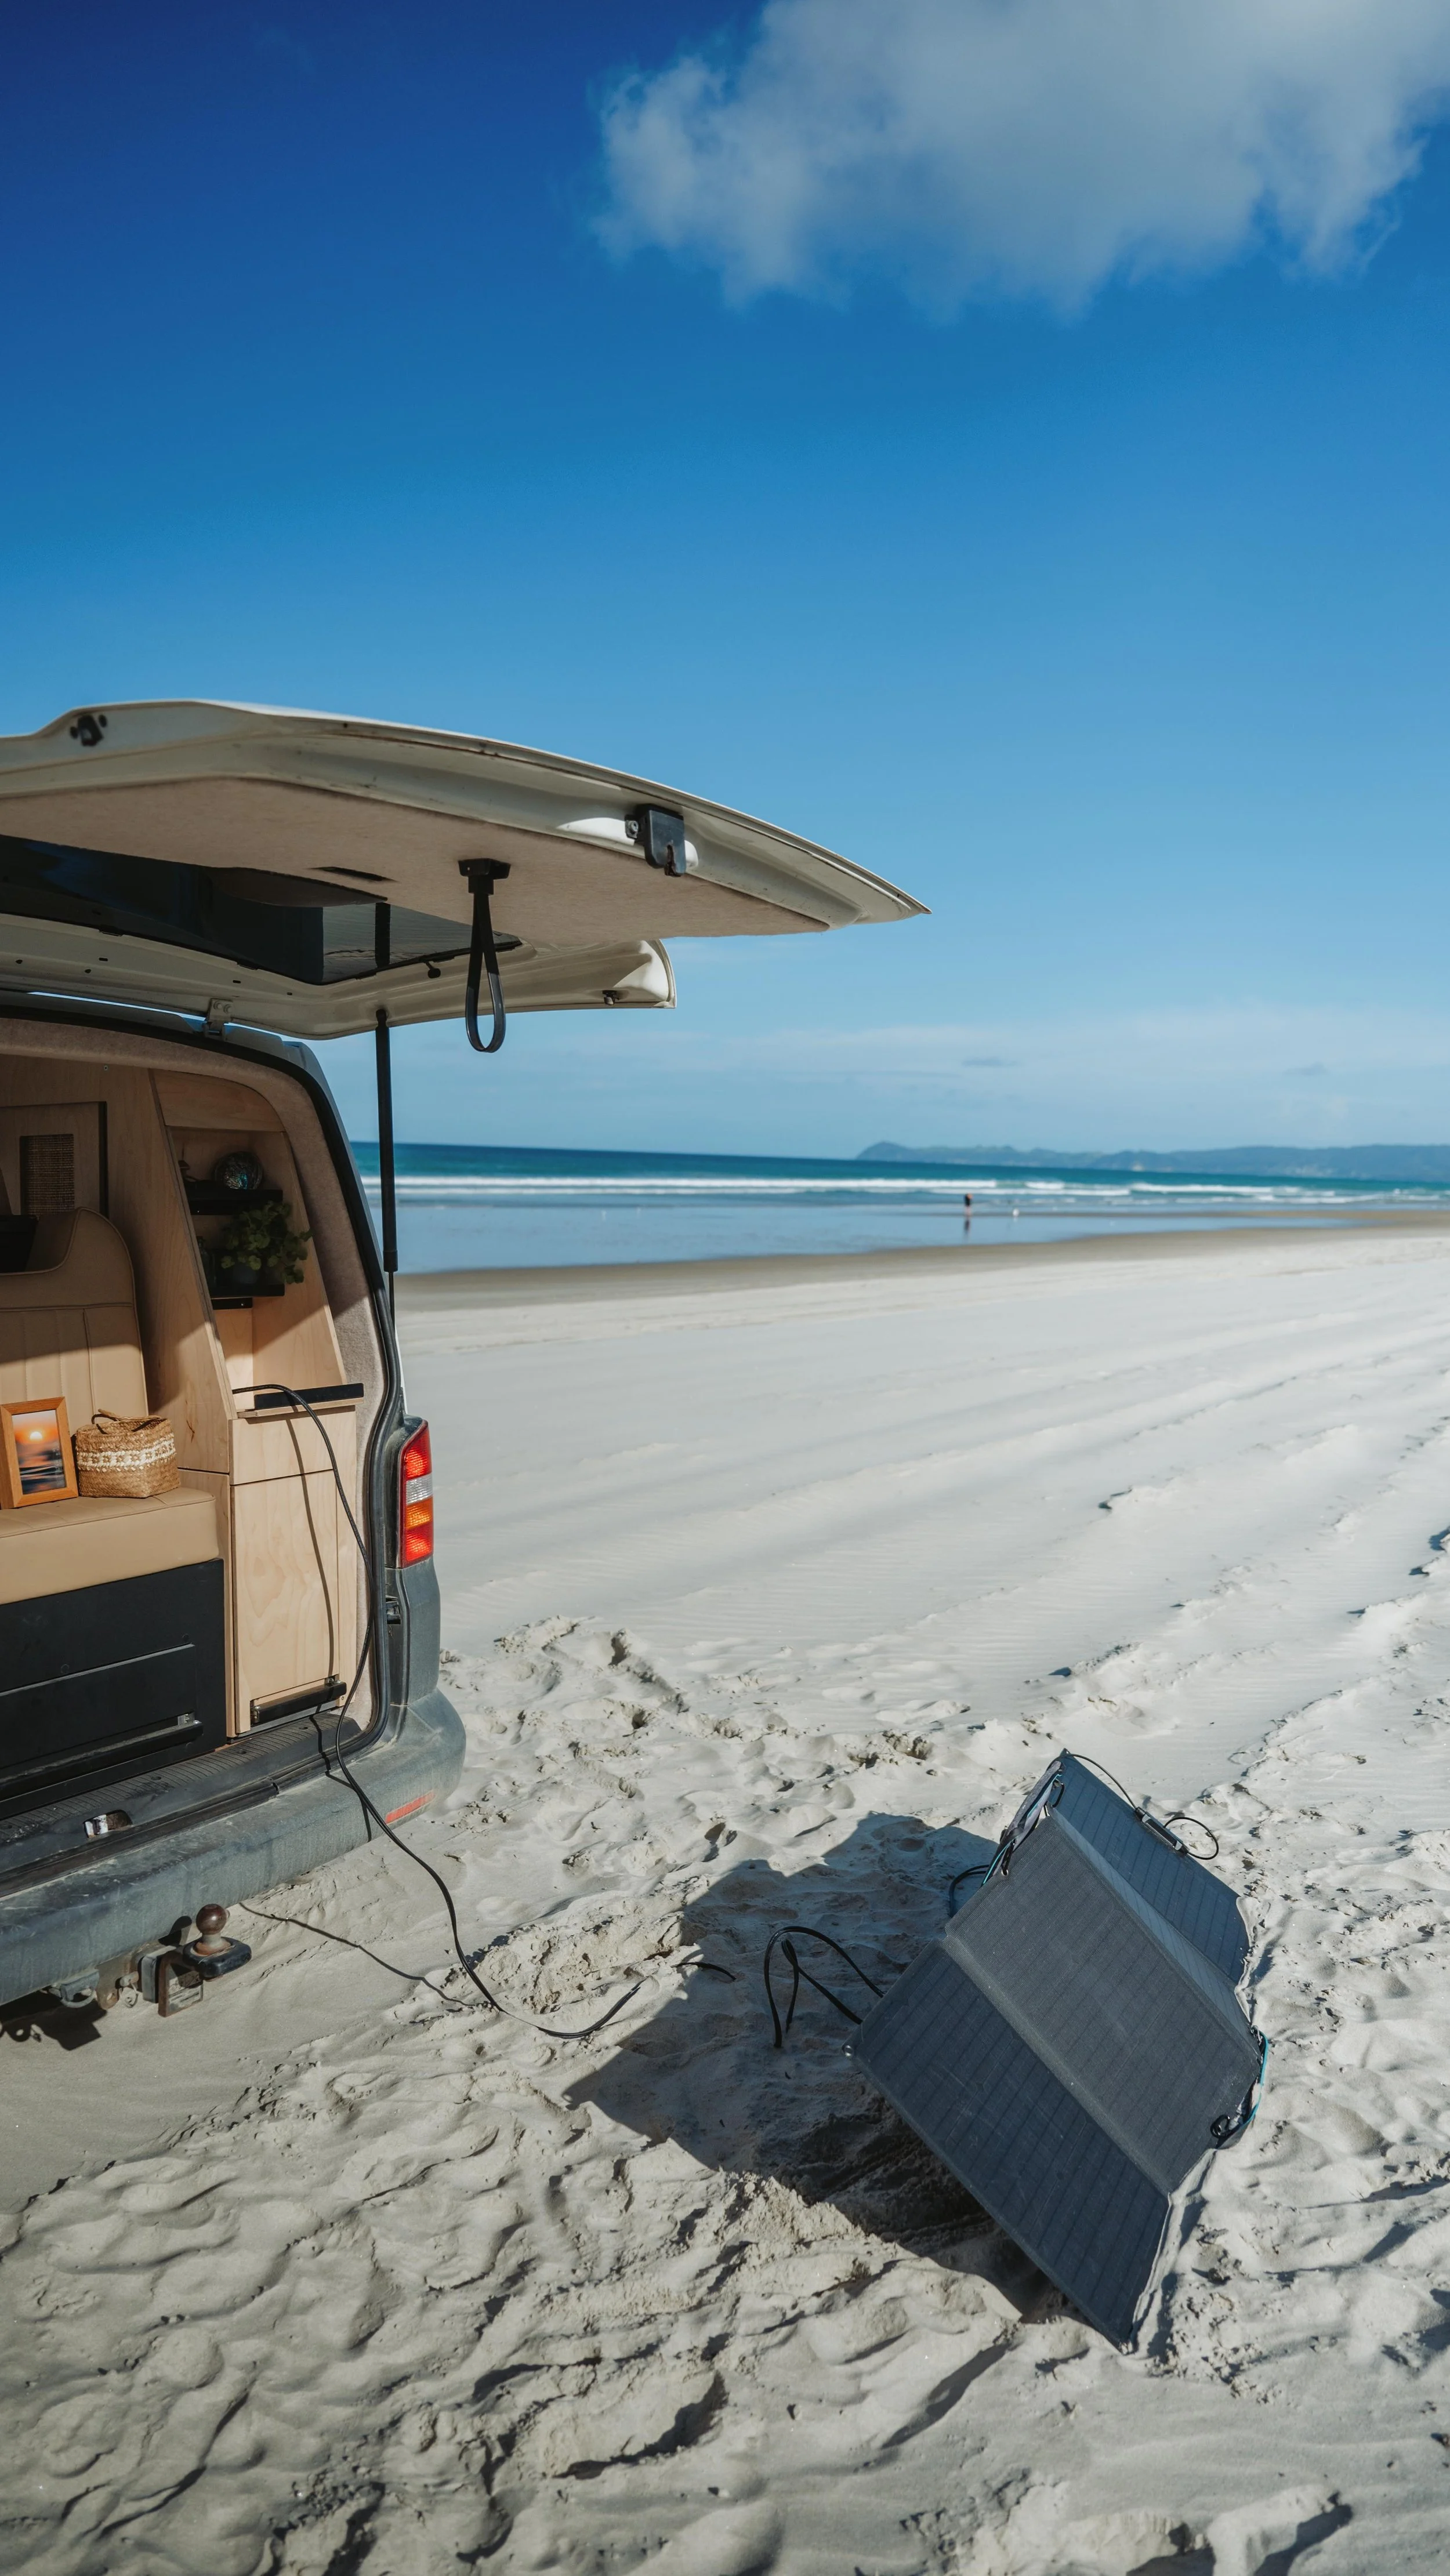
See above for how our car seat looks when we are in travel mode. It’s secured via the seat belt and the safety strap at the back is looped around the steel framing of the Rock n Roll seat. (which is very expensively secured via steel plates into the cassis of the van). Another option for a carseat with this Rock n Roll seat would be one with a stability bar that sits on the floor at the front - either option just prevents the seat from flying forward if you have to break suddenly. We just pop the carseat into the drivers or passenger seat once we are all set up so we can easily go from seat to bed mode. Our bedding also gets popped in the front when not in use. I searched high and low for an example of someone using a carseat with this setup for peace of mind before pulling trigger on the purchase, but only found one photo in the depths of Instagram. So hopefully this info is useful to someone!


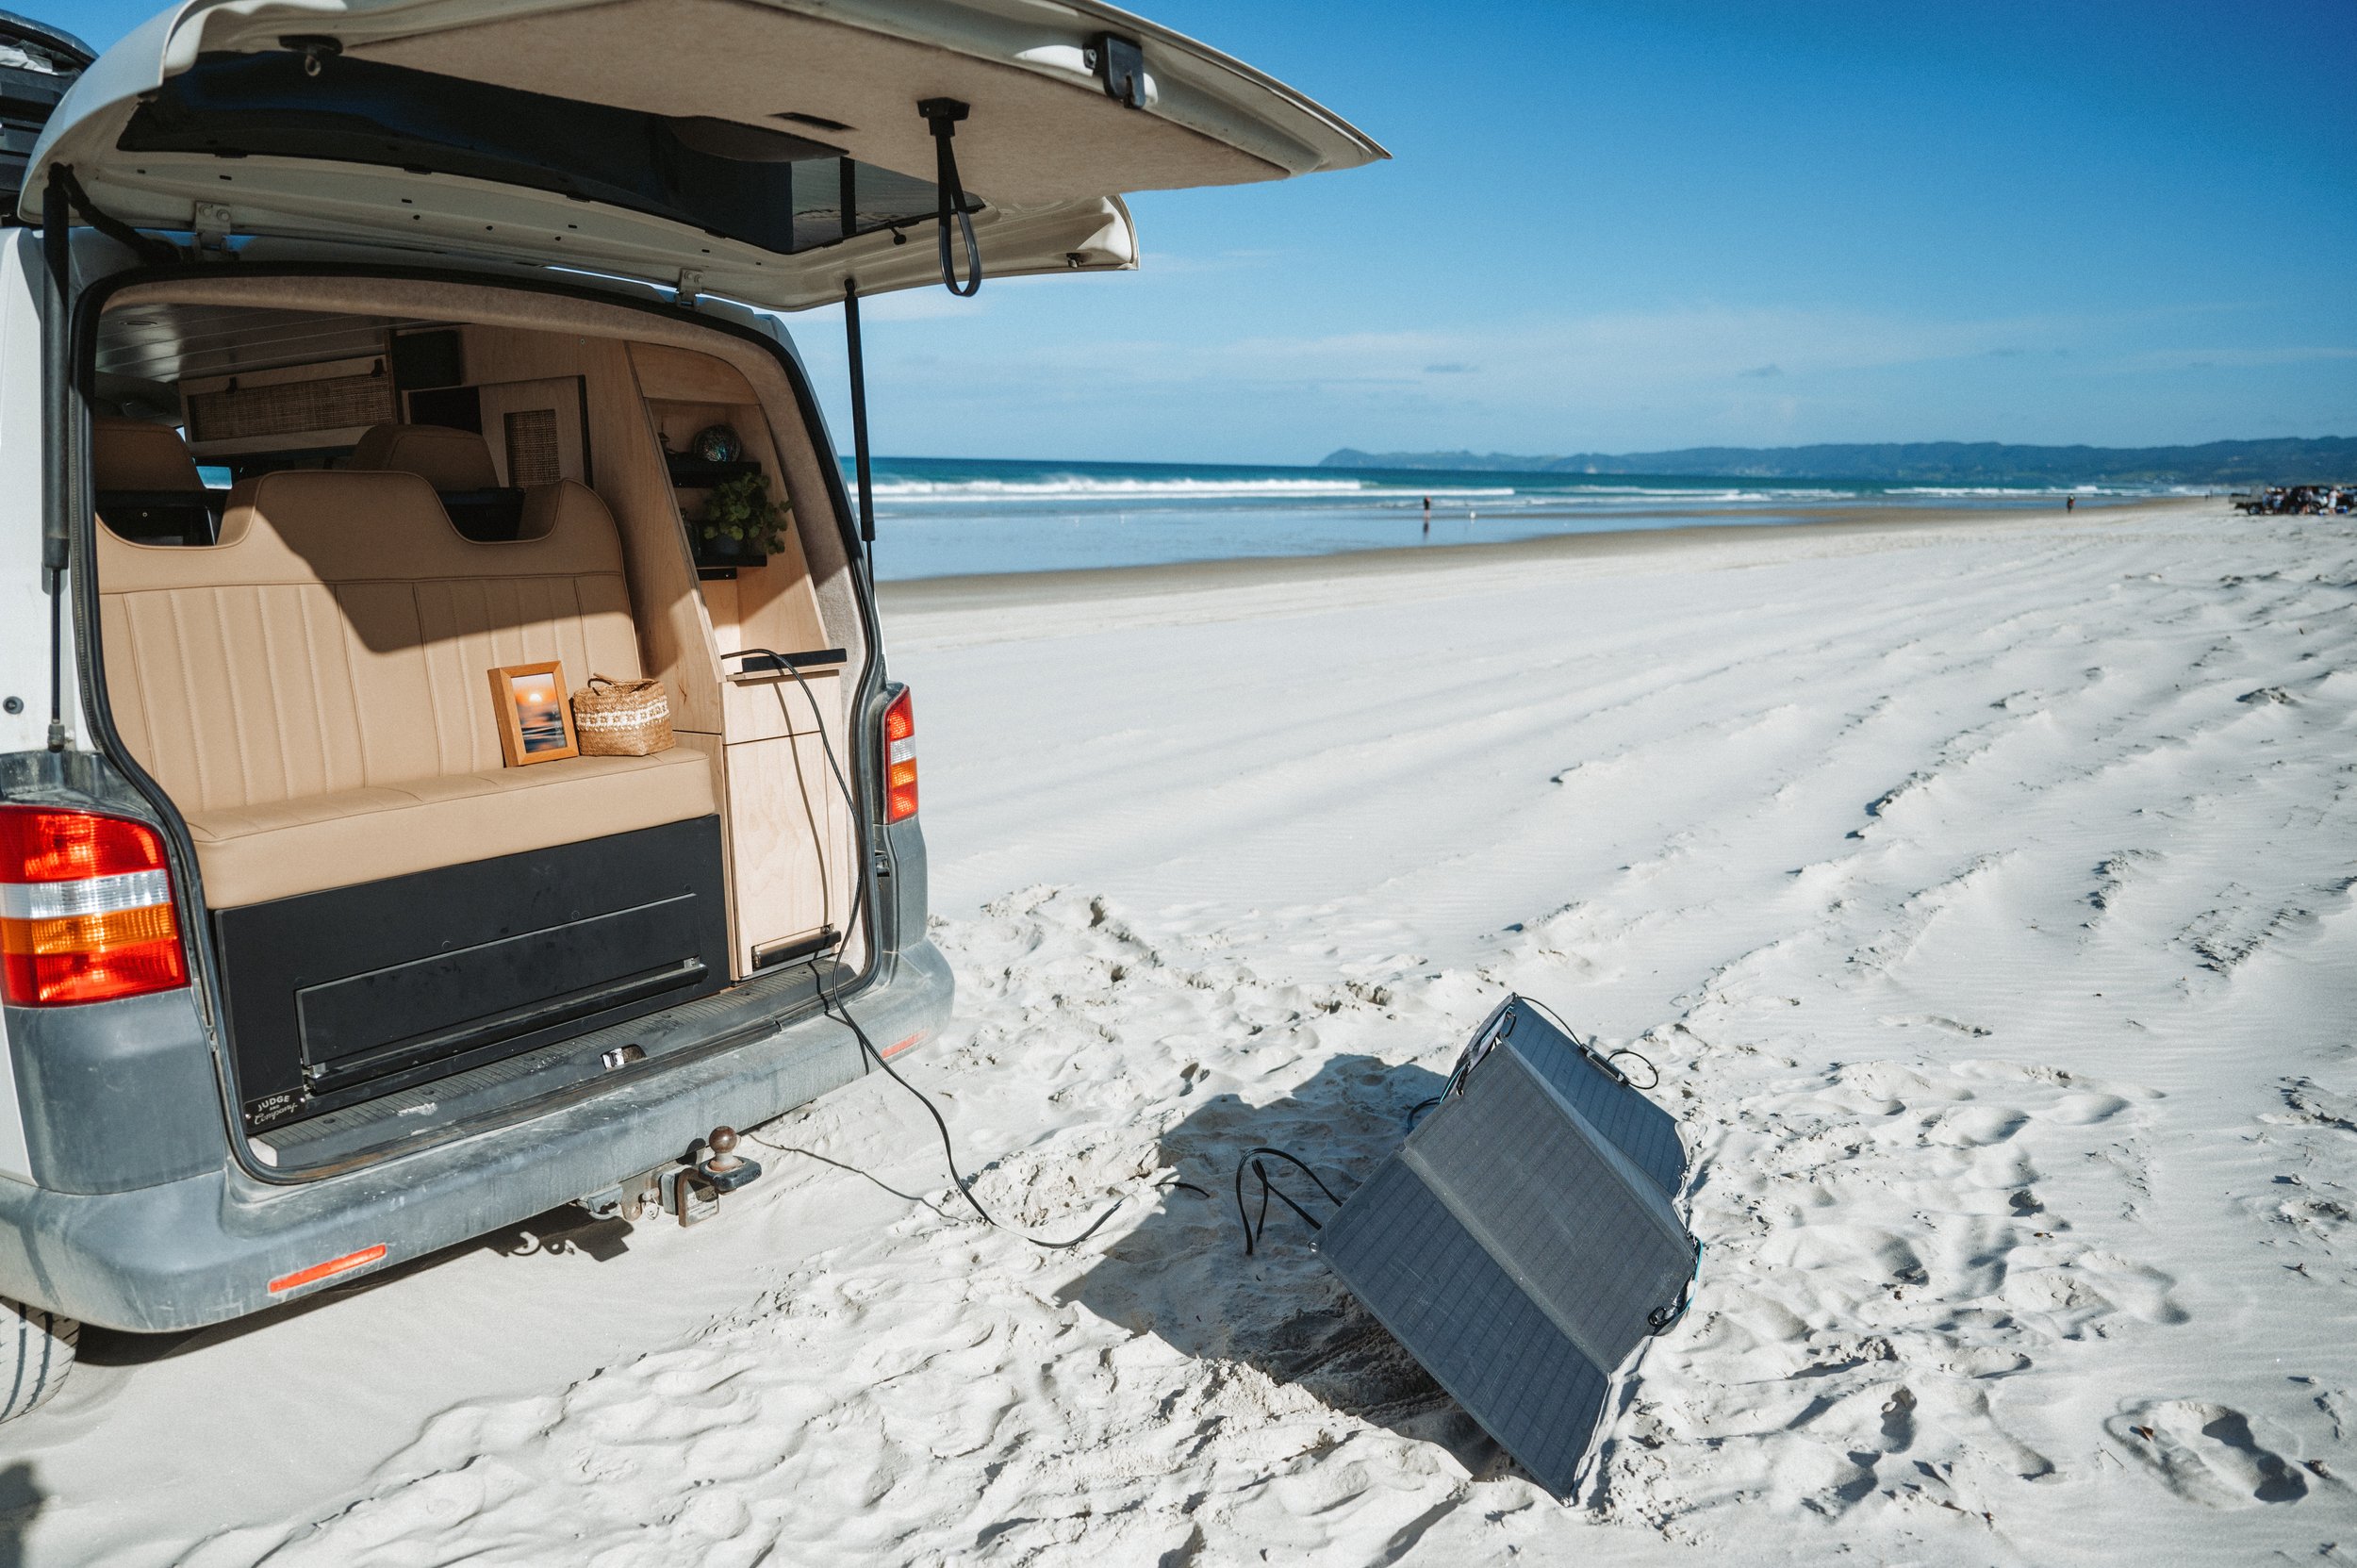


What I absolutely love about this set up with the EcoFlow, not only does it provide epic off-grid camping, but it offers the option for a mint day tripper. Because we have 4WD with diflock, this whole set-up is a breeze to get on and off the beach. Even with all the extra weight. You should see the looks we get when we roll this beauty onto the beach - people assume we are being a bit reckless and we will never get it off the beach again. I’m sure the 4WD truck owners start fantasising out getting out the strops and saving the day, but look at her goooooo.

We love loading up the fridge with drinks and food for a day or afternoon at the beach. Even just for dinner somewhere more local just to get out of the house and enjoy the summer daylight hours. To have everything we need in our little house on wheels takes away so much admin and our boy loves it.
There are still a few upgrades we will make to the van as time goes by. So far the list entails a side opening window above the sink, a swivel seat base for the passenger seat, Apple Car play, a 4WD storage trailer and a facelift for the front of the van using parts from a T6. But for now we are absolutely stoked with our little adventure mobile.
Before I sign off, I’ll leave a list of links all the products used below (in the rough order we executed everything). We extend our deepest thanks to EcoFlow and Judge & Company for making this build possible. It definitely would not be what it is without your support and input. Here’s to summer 24/25!
EcoFlow Power Kit (Sponsored/gifted): https://ecoflowtech.co.nz/products/power-hub-combo?variant=42839600234655¤cy=NZD&utm_medium=product_sync&utm_source=google&utm_content=sag_organic&utm_campaign=sag_organic&gad_source=1&gclid=Cj0KCQjwvb-zBhCmARIsAAfUI2vE11hfNy90Ae8Rjn1k8VYZMKfAEZFv42mzj2J04cu4UVP1MRWMiysaAoE1EALw_wcB
Van cabinetry fit out (part sponsored): https://judgeandco.nz/
Rusty Lee Rock n Roll seat (3/4 width): https://www.vwrustylee.com/product/vw-t5-t6-bed-3-4-width-tested/
Upholstery: Don & Luke - 027 420 4010 (professional boat upholsteries in Kaukapakapa, Auckland)
Seat installation: Fraser Cars, Beach Haven Auckland - https://www.fraser.co.nz/
Insulation: https://www.woolinsulation.kiwi/
Flooring vinyl: Flooring Xtra: https://www.flooringxtra.co.nz/flooring/sheet-vinyl/wood-look/traffic-250-jcstrda11-5626005
Wall carpet: Coastal Marine Upholstery https://www.cmu.co.nz/
Spray adhesive: Bunnings - https://www.bunnings.co.nz/ados-575ml-multi-purpose-spray-adhesive_p0136228 (Used approx 6 cans)
Various fuses, wire, connectors: Jaycar - https://www.jaycar.co.nz/heavy-duty-silicone-hook-up-wire-10m-handy-pack-black/p/WH3037
USB wall socket power point: https://themarket.com/nz/p/usb-type-c-wall-socket-power-point-black/5189-7045266866255?skuid=22905247&utm_source=google&utm_medium=cpc&gclid=Cj0KCQjw84anBhCtARIsAISI-xdTUqp9Snqk_Q3-H_p5loAkVmngO8ze02q-oM6_a1kXalU3uE_2bH0aAqLAEALw_wcB&gclsrc=aw.ds
LED Ceiling lights: https://www.amazon.com/dp/B012ZOI3ZW/ref=pe_386300_440135490_TE_simp_item_image
Sink: https://www.aliexpress.com/item/4000879531428.html?spm=a2g0o.order_list.order_list_main.40.7d9b18029NOYMO (B set)
Fridge: Dometic CRX1050 https://www.dometic.com/en-us/outdoor/boat/boat-refrigerators/dometic-refrigerator-crx-50e-30988 (Purchased from https://www.marine-deals.co.nz/ however no longer available with them)
Water pump: Shurflo pump and inline filter (purchased and installed by Judge & Company)
Water tanks/containers: https://www.caravancamping.co.nz/shop/sale-products/fresh-water-tank-20l-rectangular/ (x 2 - one for fresh water and one for grey water)
Plates, bowls & cups: Unbreakable Wheat Straw Dinnerware Set - https://www.amazon.com/Dinnerware-Beige-Unbreakable-Safe-Lightweight-Set-Reusable-Dishwasher/dp/B08GFJBL6M
Glass look cups: Shatterproof, BPA free plastic whiskey glasses - https://www.amazon.com/Amazing-Abby-Old-Fashioned-Unbreakable-Dishwasher-Safe/dp/B091C5TNKF/ref=sr_1_1_sspa?keywords=plastic+whiskey+glasses&qid=1685746495&sr=8-1-spons&psc=1&spLa=ZW5jcnlwdGVkUXVhbGlmaWVyPUEyU0ZaMUdYSTEzRlpLJmVuY3J5cHRlZElkPUEwNjI1NTQ4MURGWEZFOFJNTlAxMCZlbmNyeXB0ZWRBZElkPUEwMzAyNjk5MjJJUEtEWEdRMFVQWiZ3aWRnZXROYW1lPXNwX2F0ZiZhY3Rpb249Y2xpY2tSZWRpcmVjdCZkb05vdExvZ0NsaWNrPXRydWU=
Pull out under sink storage: Amazon (link no longer active but was very similar to this except has runners that screwed into the cupboard) - https://www.amazon.com.au/Wuciray-Organiser-Adjustable-Bathroom-Organisation/dp/B0CT5F7P5G/ref=sr_1_14?crid=103Q3XYMYSP0E&dib=eyJ2IjoiMSJ9.FdXd0746jm__L3zxUf9X3E6vdOwkBuZmIBZrGHTxnPmH_xUu8hxoC2PqkWk8Hdz_uM2uQzmpHHNgdAvtc06B157UWqGkkkQ-rnC6sIWGT3VAf2WCXwbUbnGdwzp66iXV6-okmxhWBqcuHKUjDMCHkQwd3qnimBhx4fAk0bQSjwf7PAd3pBf_HyF0lh06dscoxWVg4wsReaQpBw27bXXTKq49prOTLRZT_4qfbilhU1GbkxRZmcun5oNRWn0TAIX5Nv7FGbFzLXWbbIF_hcyH77hCS3dJskd8Yc_JMBSZKFw.TTIrfFvcQ-pbTKGc2ygG8IrmDI6aEj1s4AXTmYhYzgo&dib_tag=se&keywords=under+sink+storage&qid=1718666662&sprefix=under+sink+storag%2Caps%2C382&sr=8-14
Beezewax: Bunnings - https://www.bunnings.co.nz/glitz-200g-beezwax-polish_p4460472
Tongue & groove: Bunnings - https://www.bunnings.co.nz/pinetrim-plus-135-x-18mm-5-4m-tongue-and-groove-panelling-fj-ut-pre-coated_p0298368
Screws, Ply, Cladding, battens, paint: Bunnings trips x 5942
Hardwood for lined wall: Bunnings - https://www.bunnings.co.nz/2400-x-1200-x-3-2mm-standard-ibs-hardboard_p0621012
Mozzie net: https://www.equipoutdoors.co.nz/LifeSystems_MicroNet_Mosquito_Net.html
Camping table: https://www.equipoutdoors.co.nz/zempire-kitpac-table-large-v2
Camping chairs with cooler pocket: https://www.macpac.co.nz/macpac-cooler-armchair/117730.html?dwvar_117730_color=Balsam%20Green&dwvar_117730_clearance=no#start=5
Yeti mugs: https://www.theboardshop.co.nz/
Yeti 105L chilly bin: https://www.theboardshop.co.nz/
Air fryer: Briscoes - https://www.briscoes.co.nz/product/1108400/russell-hobbs-satisfry-air-fryer-small-rhaf18/
Splashback tiles: Tile Space - https://tiles.co.nz/straight-black-06t-gi-7003/
Plumbing advice from Caleb at Betta Plumbing - www.bettaplumbing.co.nz
Blind materials: Spotlight
Rattan cupboard inserts: https://www.etsy.com/nz/listing/1000368115/60cm-wide-radio-weave-high-quality?ref=yr_purchases
Bedding: https://sheetsociety.com/en-nz
And of course not forgetting our OG adventuring items: Feldon Shelter Hawkes Nest (wide), Rhino Rack Sunseeker Awning and my beloved Nikon gear that allows me to capture all the fun times!